Featured in Star Trek: The Next Generation and many other films, spinoffs, books, and various products, the USS Enterprise Star Trek model has played a significant role in the fictional crew’s life and has become an outstanding collector’s piece to add to a personal collection of ships from the iconic franchise.
The beautiful Enterprise D model keeps impressing hobbyists in the 3D printing world. This Galaxy-class ship boasts a fantastic design that takes the most recognized features of the original Enterprise and brings them into a bigger ship with sleeker lines and rounded contours. Hobbyist Scott Davis chose not only to 3D print starship Enterprise but also illuminate it with LED lights and design an exclusive wall mount for displaying his masterpiece.
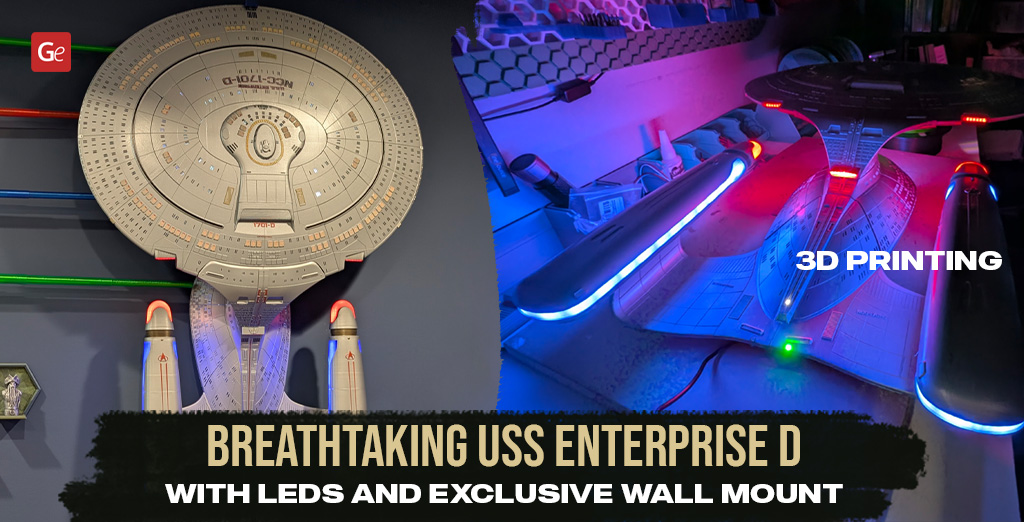
USS Enterprise Star Trek Model
You can download the Enterprise STL for the NCC-1701-D version on Gambody marketplace. It’s a stunning 3D model resembling the TV series ship so closely that you can imagine the crew peering through the many tiny windows (some can be lit up) as they travel through the galaxy. The design allows you to separate the saucer, print any of the two hull versions (with and without lettering), place the ship on the platform, adjust the tilt angle, and introduce LEDs through the tunnels.
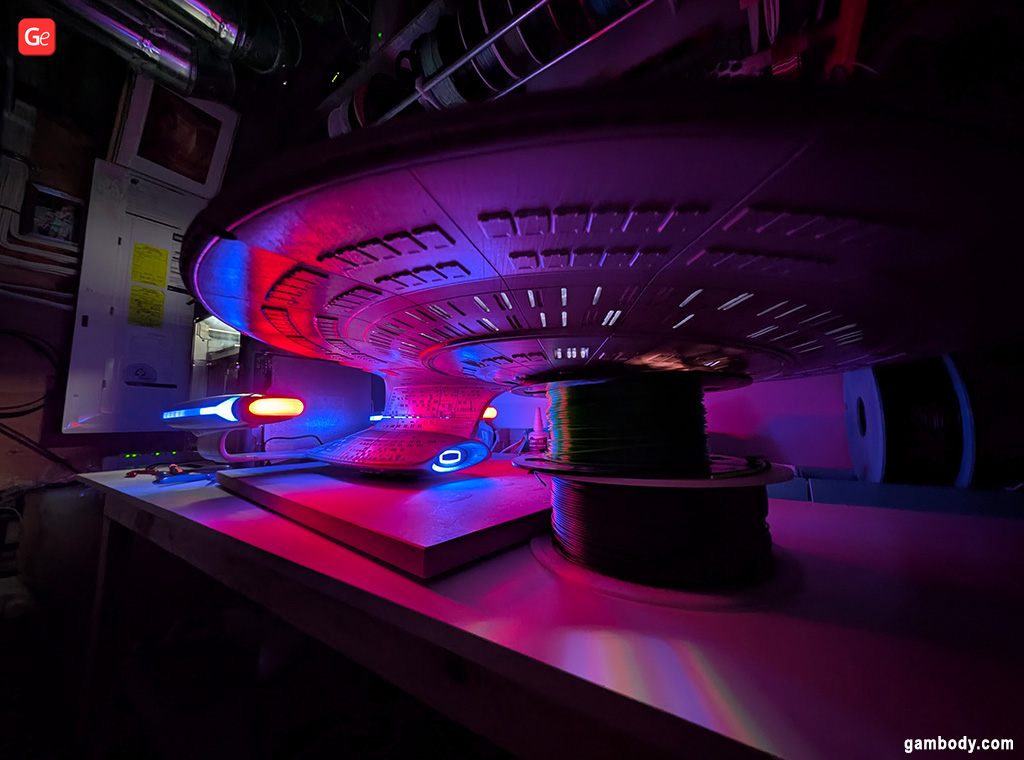
Tips on 3D Printing Star Trek Enterprise D
Before you 3D print your USS Enterprise Star Trek model in resin or filament, read our interview with Davis. This talented enthusiast shares his tips on printing and illuminating the iconic ship. He also explains how to add LED lights and mount the piece to your wall.
1. Hello, Scott! First of all, Gambody team adores your 3D printed and lighted Enterprise D model! When did you first fall in love with 3D printing?
Hi, and thank you for the opportunity to talk about my hobby! I bought my first 3D printer on Christmas 2023. I don’t remember specifically what made me decide to jump in, but I just felt like the time was right and the prices were right. I started with an Anycubic Kobra 2 Pro, then 5 months later I upgraded to a Bambu P1S, and I’ve been printing pretty much constantly ever since.

2. Are you a big fan of the Star Trek TV series and sci-fi franchise?
Yeah, you could say that. I have memories from my childhood when my Dad would watch Star Trek: The Next Generation later on in the evening, after my bedtime, and I would sneak downstairs to watch the show without anyone knowing. I’ve been a fan ever since. As an Engineer myself, there’s just something about the science and engineering concepts that infuse the franchise that speaks to my soul, not to mention the peaceful and inclusive values that Star Trek’s creator, Gene Roddenberry, tried very hard to make a key element of his show.
3. How big is your collection of 3D printed Star Trek ships?
I currently only have the two Enterprises from the Star Trek universe, the D from TNG, and the E from the movies. That said, I will admit to being tempted by the Klingon ships.
Read also: Lighting Up Star Trek Borg Cube (How a Hobbyist Turned Gambody’s 3D Model Into a Beautiful Ship with LEDs).
4. You chose to print Enterprise E at 160%. Did you also upscale the USS Enterprise Star Trek model (NCC-1701-D)? If so, what is the scale?
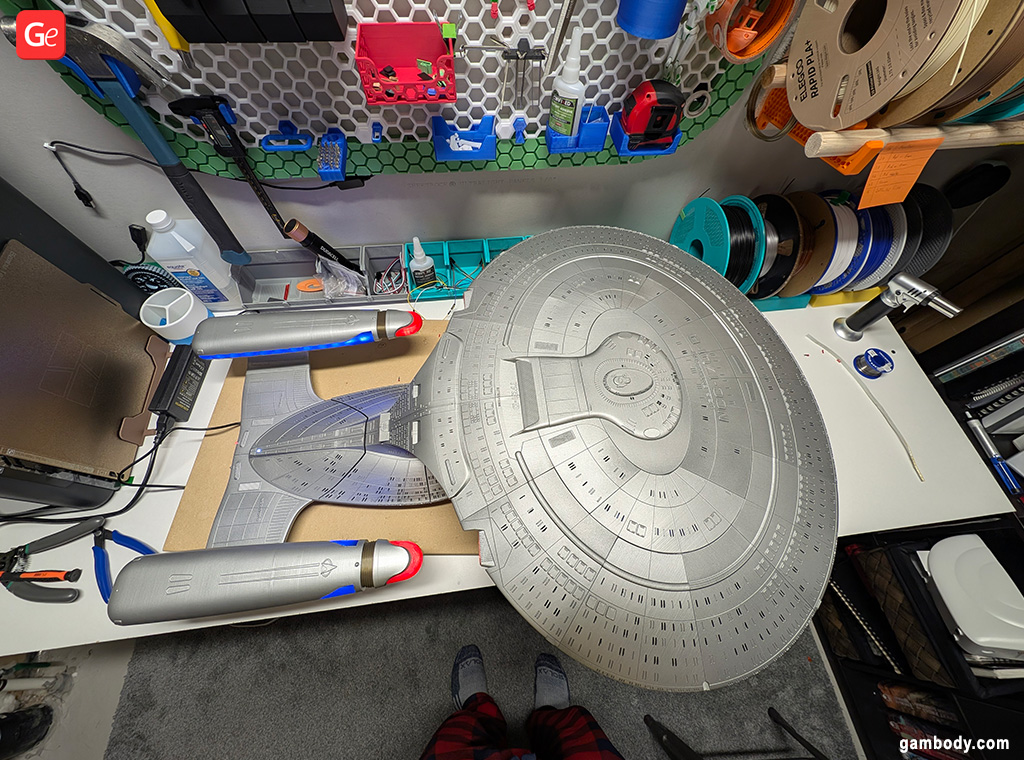
My first attempt to 3D print Enterprise E was at 100%, and I knew right away, once it was in my hands, that I would struggle too much to try to do any lighting at that size. 160% was as large as I could go at the time with the printer I had, and I was able to run the wires I had through the channels much easier at that scale. When the time came to work on the USS Enterprise Star Trek D model, I knew right away that 100% scale was good enough for me, since the D model is quite a bit larger than the E version, and even at 100%, I wasn’t quite sure where I was going to put it, considering that it’s approximately a meter (nearly 3.3 feet) in length!

5. What printer and filament did you use for this Enterprise D 3D model? How many spools did it take?
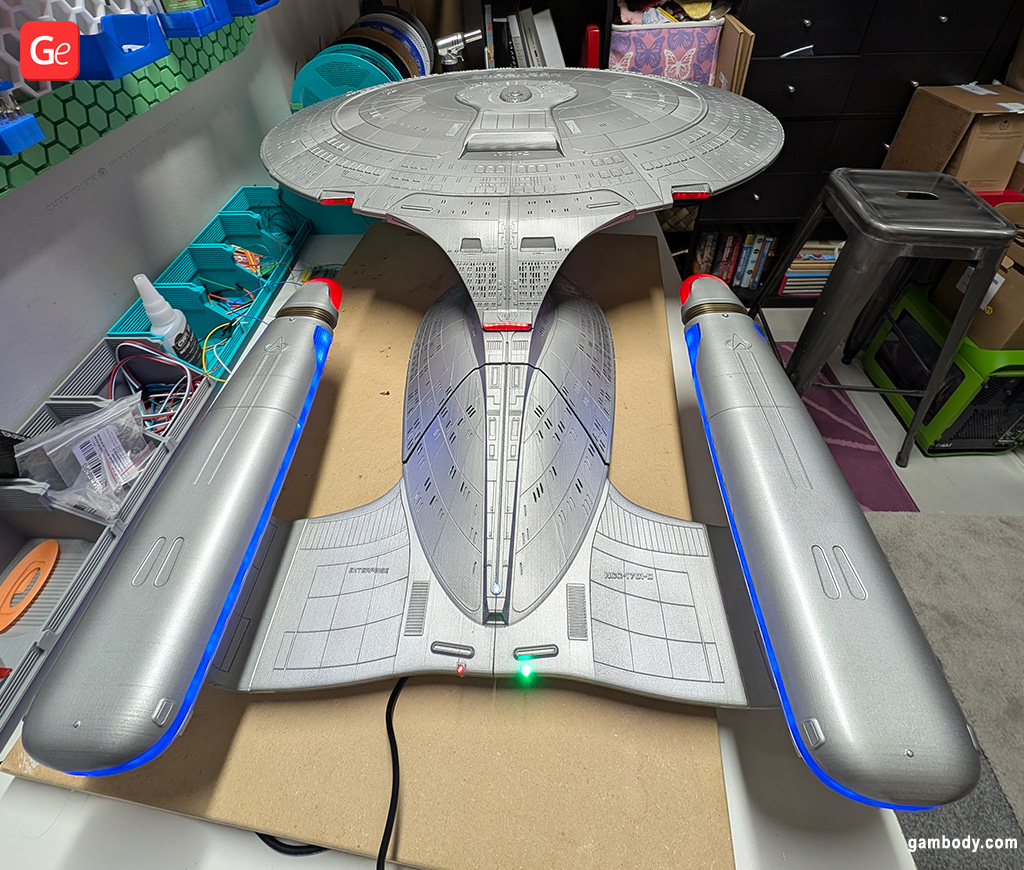
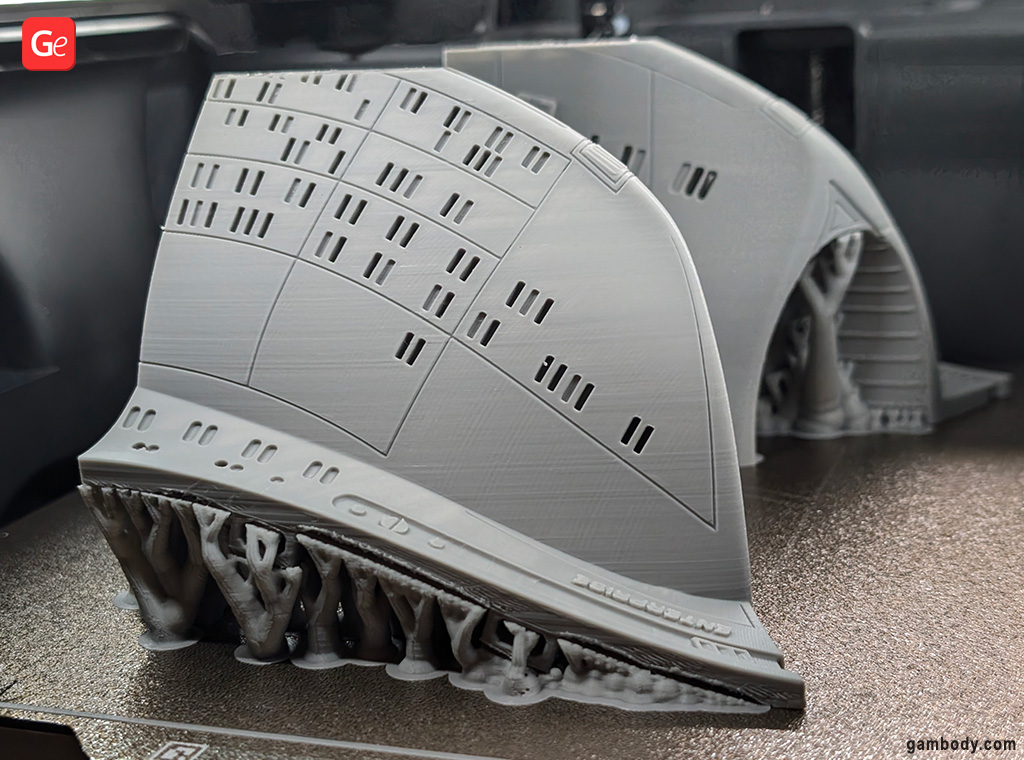
If I recall correctly, I spent two to three months printing parts for the Enterprise D model with my Bambu Labs P1S. With so many parts and its size, I think I needed around four rolls or so. I used some Elegoo PLA+ gray filament, as I found a good deal for it.

6. Did you end up using transparent filament for the warp nacelles?
For the warp nacelles, I found some blue and some red translucent PLA to use. This way, the color is still present even when the LEDs are off, and when the lights are on, they shine through the colored translucent filament just about right.
Read also: Different 3D Printer Filament Types: Best, Strongest, Most Popular.

7. How complex or easy was cleaning the parts from the supports? Did it take you a lot of time?
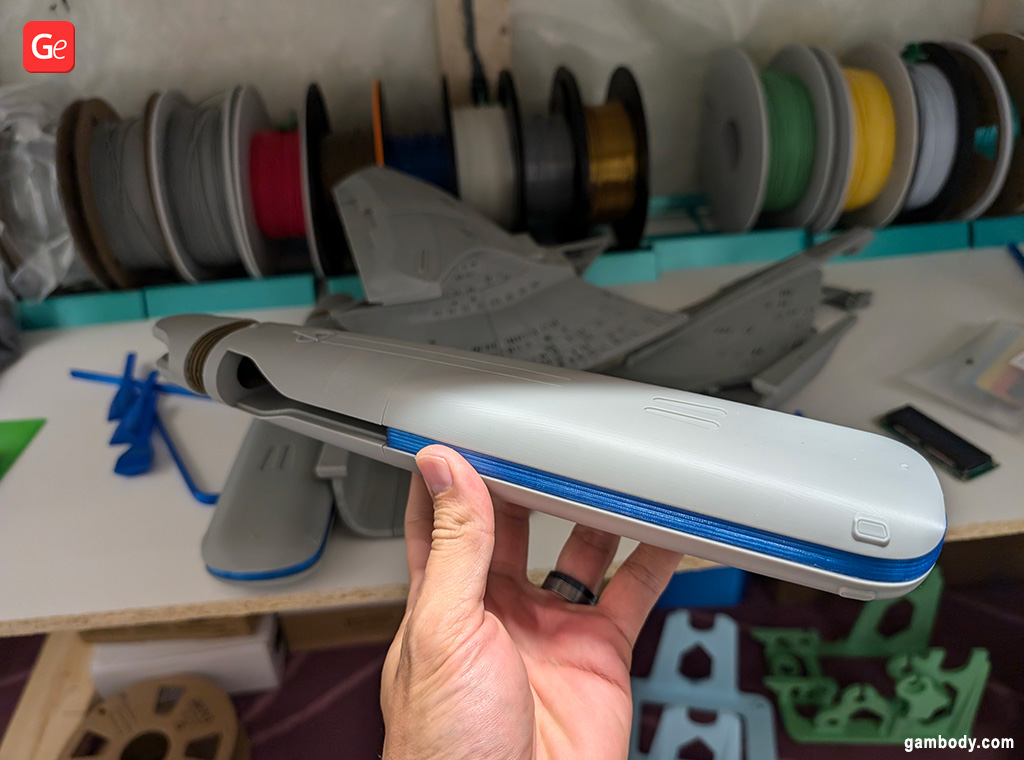
I don’t remember having too much trouble with removing supports; I think I had my support settings dialed in pretty well. I had some trouble with corners lifting off the build plate mid-print due to thermal contraction. A couple of pieces of my saucer section have little gaps in them because I didn’t reprint pieces, which, due to the thin nature of the parts, experienced some minor lifting/warping during 3D printing Star Trek ship. Fortunately, practically all the parts were printable with supports on interior faces, meaning that there weren’t very many exterior hull sections that needed any supports.

8. How did you prepare each 3D printed part of the Enterprise D model for painting?
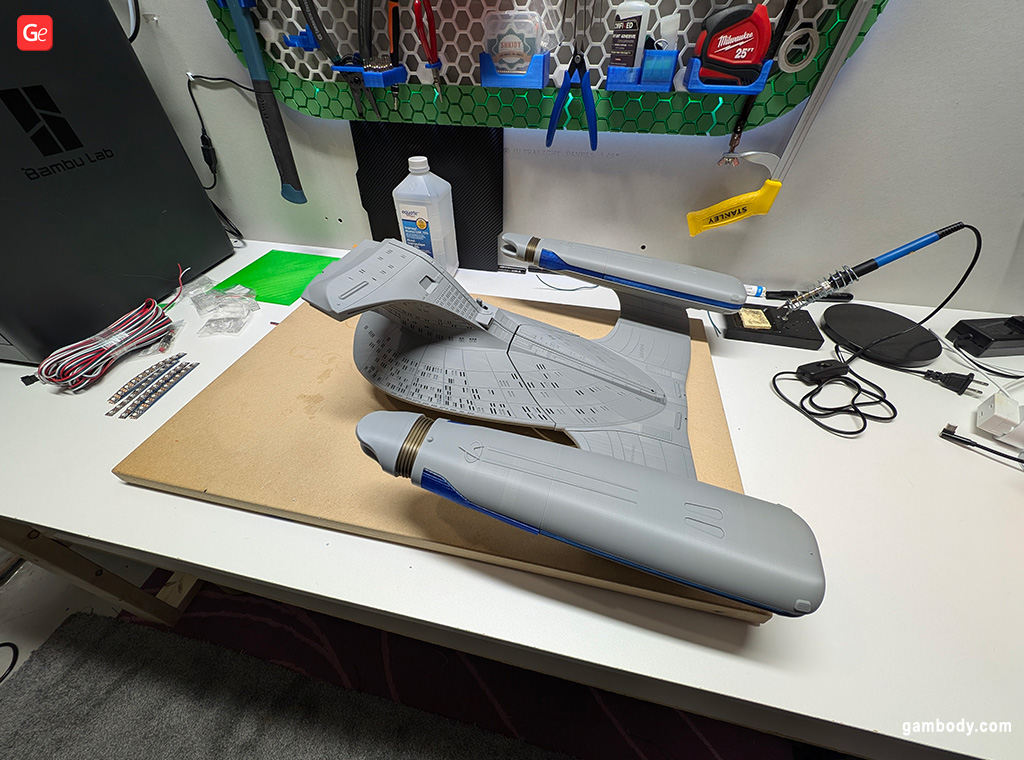
This USS Enterprise Star Trek model has a significant number of individual parts, and I’ll admit to having been intimidated by the sheer amount of post-processing I would need to do. In the end, I spent quite a bit of time hand-sanding each part, though I can’t say I dedicated an equal amount of sanding time to every part. Sanding is hard work, and I didn’t have a good power tool to help with the process. I definitely could have done more sanding than I did to get a smoother exterior surface for the Enterprise D 3D print.

9. Can you share more details about your experiments with different paints? What did you end up using?
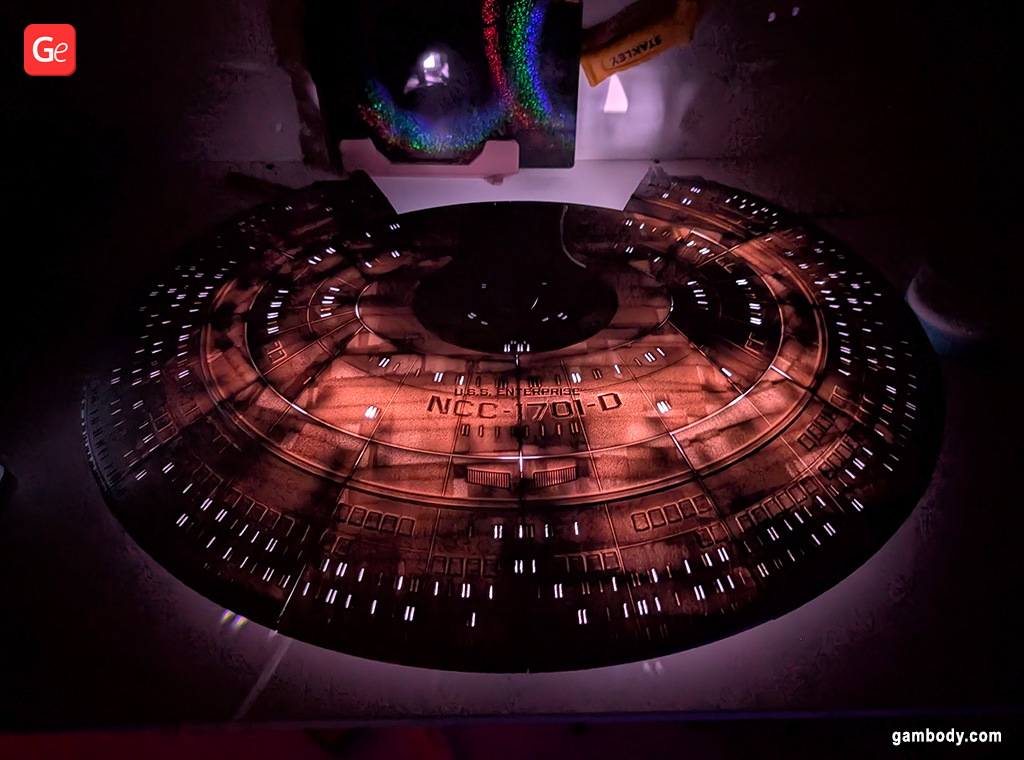
I struggled for a while to decide how to do the color on the hull. I knew I was going to paint, as the raw plastic, while being gray, just wasn’t good enough. I ended up finding a Spray Paint of a metallic silver/aluminum shade that I was happy with. Pretty sure that I went through two full cans painting all the hull pieces, which I did separately, i.e., before assembling them. I did that because I didn’t want to have to try to mask off the parts that weren’t supposed to be the silver color.
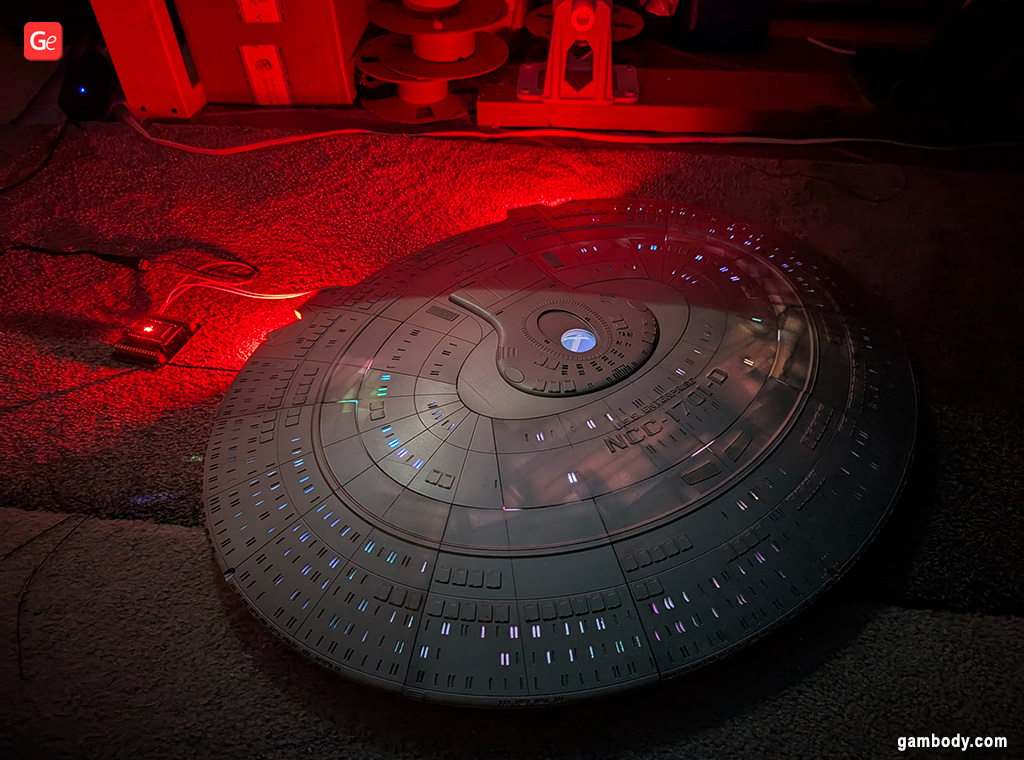

10. What is more complicated and faster to use: a metallic aluminum color spray paint for the body or acrylic paint pens for detailing?
Well, the spray paint is definitely faster and easier. I just set up the pieces of the Enterprise 3D print in my garage and gave them all a few quick passes with the spray can. The acrylic paint for the detailing was much trickier because there was no margin for error. With the spray paint, I could just paint the whole part. For the detailed work, you have to go extra slowly and be super careful not to mess up.
Read also: Fantastic USS Defiant Star Trek 3D Print (Advice by Anthony Sforza).
11. How did you create your own channel to run the wires from the engineering section to the saucer section?
I had made the decision to join the two halves of this Star Trek 3D print permanently, as opposed to leaving the option for displaying them separately (I mean, in the show, you only see them separate a handful of times over 7 seasons). I knew that I was going to put the electronics and the power source in the engineering section, and was thus a little dismayed to see that there was no easy way to run wiring up to the saucer section. With the parts already printed and semi-assembled, I carefully lined up the parts where the two sections joined, eyeballed a spot on both, and took my soldering iron and just melted a hole through the hull.
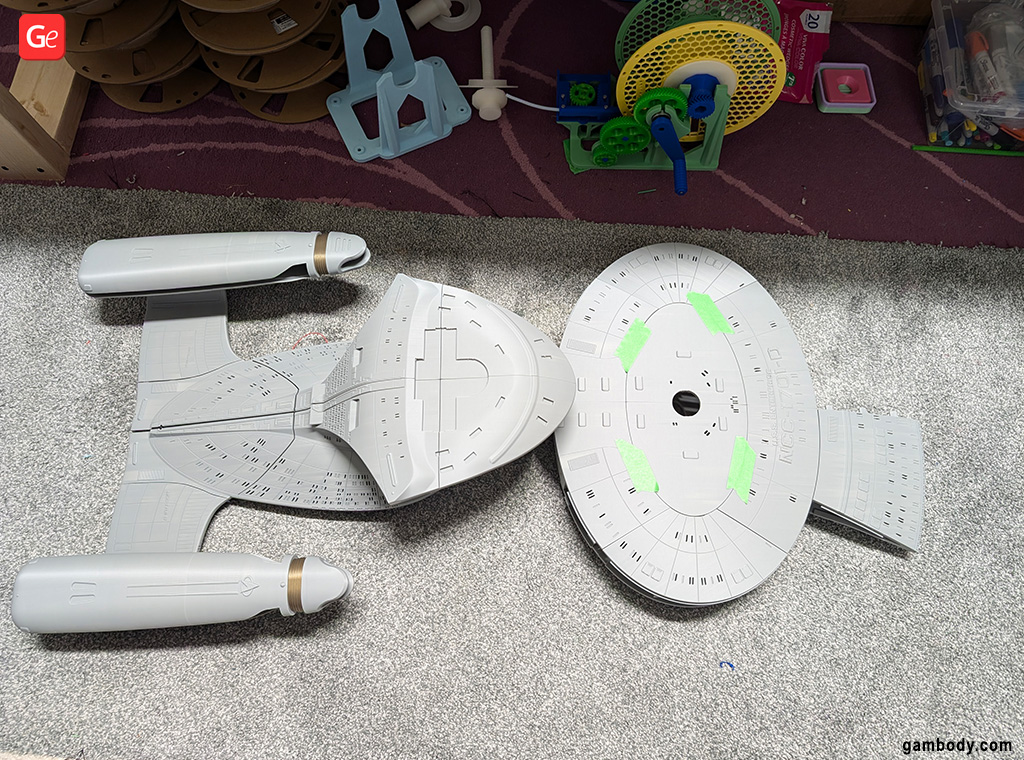

12. Please tell our readers more about wiring your USS Enterprise Star Trek model. How many simple LEDs, regular LED strips, and ws2812 LED strips did you have to buy?
If I could do it over again, I would probably do things differently, particularly for the white strips that light up the windows of the ship. I have used:
- A regular 5mm 5V white light strip in the saucer section, just a single strand looped through the interior;
- A 5mm ws2812 strip looped around the interior of the engineering section;
- A 3mm ws2812 cob strip cut to size for each of the Saucer Impulse Engines;
- Regular 3mm white, red, and green LEDs for the indicator lights at the back;
- A pair of regular 3mm blue LED lights for the Deflector Array;
- A strip of 3mm cob ws2812 LEDs cut down to fit in the red part of the warp nacelles;
- A 3mm cob ws2812 LED strip cut to fit precisely around the perimeter of the blue part of the nacelles.
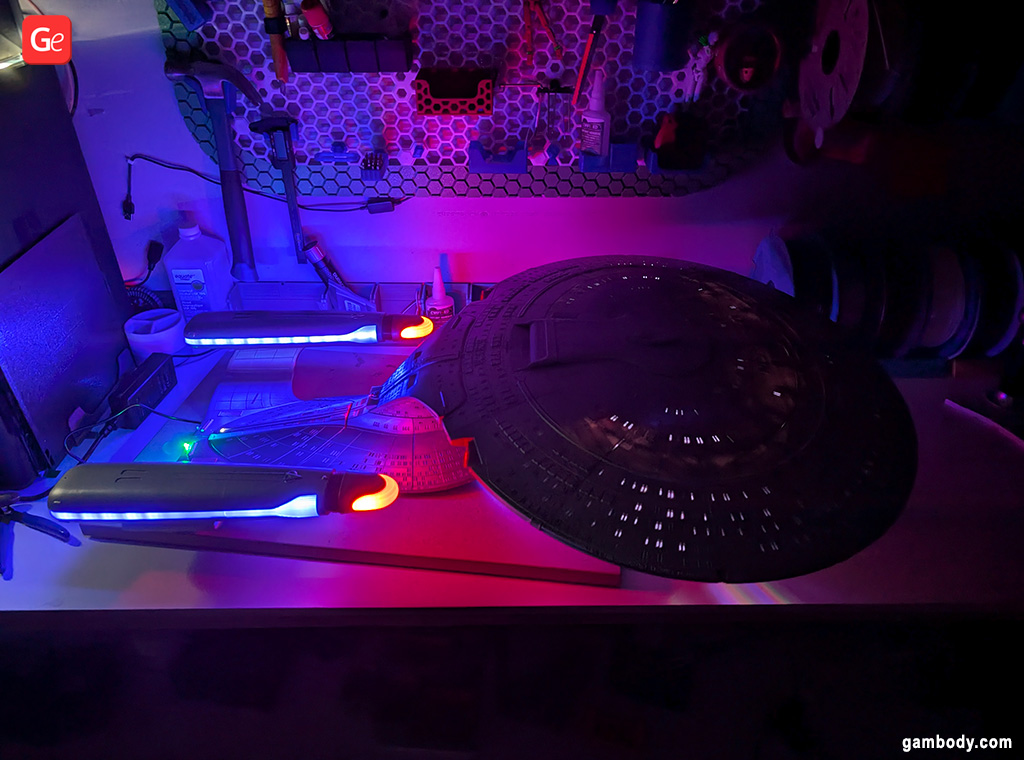

13. How did you achieve the red, blue, white, and green lights color effect?
The indicator lights are just simple 3mm LEDs with a resistor wired to the ESP32 board. I did install two greens and two reds (when looking at the model, there are spots for lights on the upper section as well as the lower section), but when wiring and assembling, the two lower LED lights either got disconnected or shorted out somehow, and so they’re no longer working. But it didn’t bother me enough to take the pieces apart to replace the LEDs, as even at 100% scale, it was pretty tricky to get those LEDs in there. I had to file down the outer perimeter of the LED to make it fit.
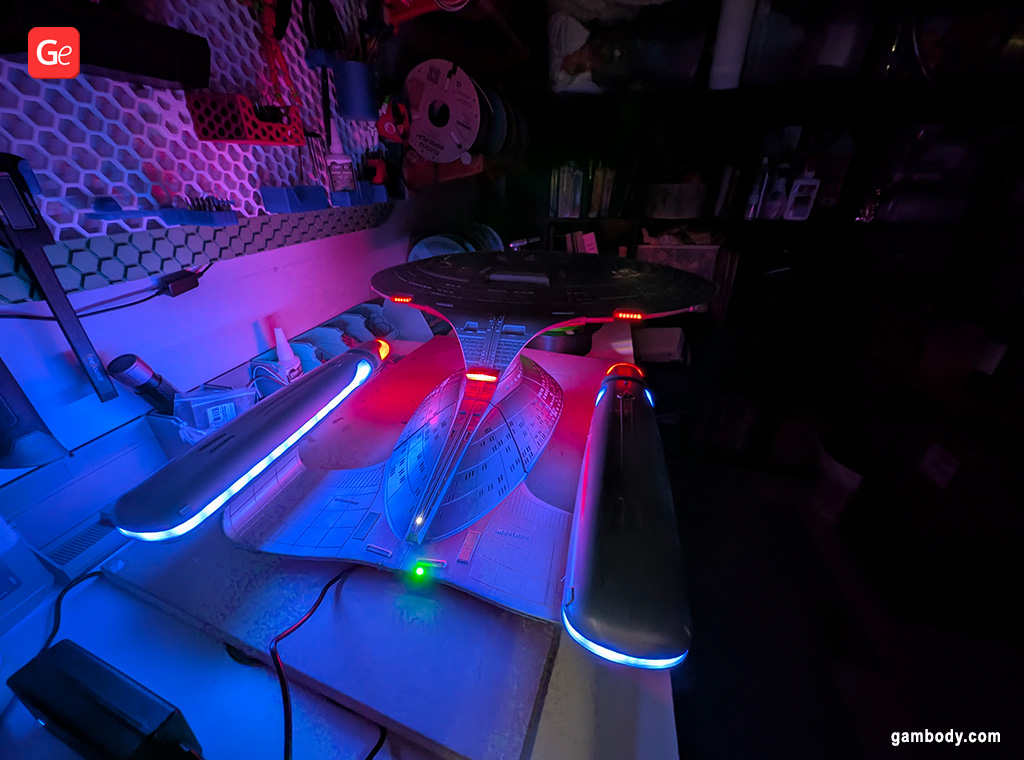

14. You mentioned using an ESP32 microcontroller running a free WLED app for controlling LED strips. Where did you place the controller?
The interior of the engineering section of the Enterprise D model has plenty of space. There’s an access panel that I left open to pass in the power cable. I’m sure I could have done a much neater job of handling the wiring in there, but with all the wires coming in from the nacelles and the saucer section, it’s admittedly a bit of a mess inside there.
Read also: How to Install LED Lights in a 3D Printed Model.
15. Does your microcontroller control all the LEDs at once? How hard was it to connect everything?
In fact, the microcontroller doesn’t control all the LEDs. I mean, it probably would’ve been a neater job if I had done it that way, but I had a 5V power supply coming in, and since the light strip lighting I used in the saucer section wasn’t an individually addressable strip, I simply connected that strip, along with the white indicator LED, directly to the 5V power supply line. All the rest of the LED lights are connected to the microcontroller, as they all have effects, such as blinking, warp effects, or color effects.
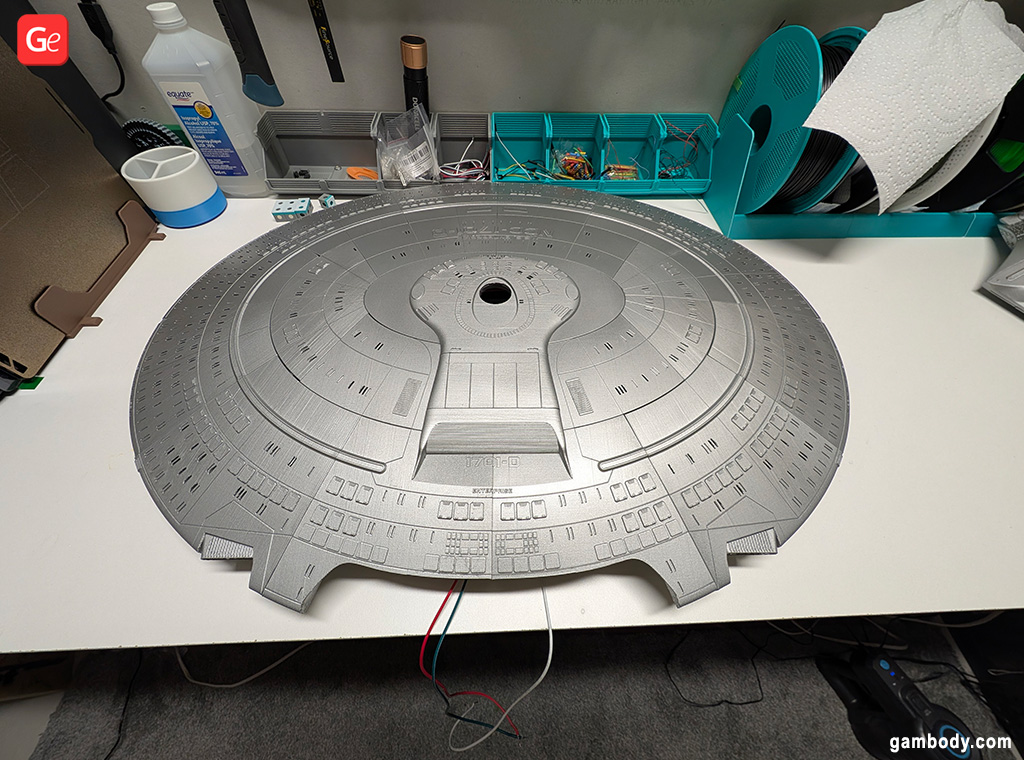

16. Does your light work from batteries or require power from an electrical outlet?
When planning the lighting for my Enterprise D 3D print, I did a rough calculation on the amount of power I would need to power that many LEDs, and I concluded that a safe power supply would be a 5V 10A power supply. With the amount of LEDs running through the ship, as well as the esp32 board, it wasn’t worth it to try to come up with a battery solution that could handle the current draw. And since it’s just on display, I had no problems with having a power cord coming out of the back of the ship.
17. What would you change about lighting up the Enterprise 3D print’s windows if you had a chance?
I am for sure a little disappointed with the way I lit the windows. On the “real” ship, each individual window is lit by the lights in that “room”, and so acts like a little point light source. For my USS Enterprise Star Trek model, because I just have the one single LED strip running in a loop through the saucer section, the light doesn’t hit all the windows equally, nor is it quite strong enough to really make it seem like the window holes are actual windows into rooms on a ship. If I were to do it again, I’m not sure exactly how I would improve it, but I know I’d use more lights and move them closer to the window holes. Some experimentation would probably be in order.
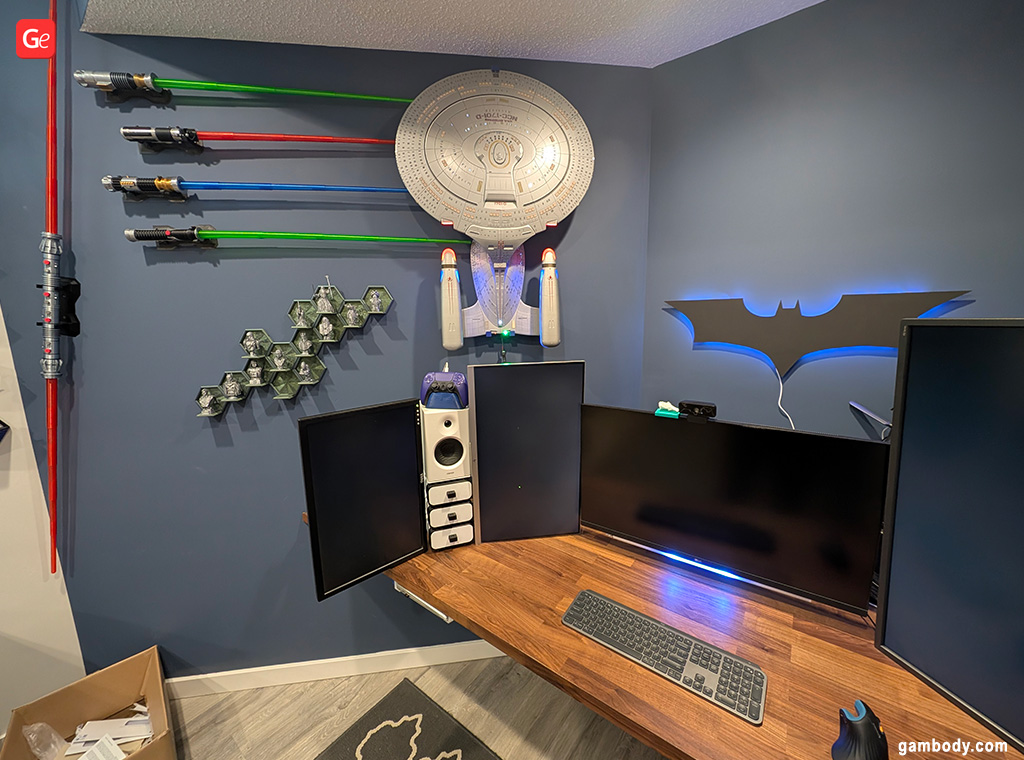

18. What software did you use to design a wall mount for the Enterprise D 3D model so that it wouldn’t take up a lot of tabletop space?
I did actually 3D print the dock stand that comes with the Enterprise D model and had it on display like that for a few weeks. But in the end, I just decided that it was taking up too much horizontal space in my office, and I needed to get it onto my wall. So I opened up Blender, which is the app I chose to learn for 3D modeling, and went to work designing a wall mount. It took a couple of iterations to get something that was the proper distance away from the wall, didn’t block the indicator lights at the back, and allowed for a straightforward installation, but I was pretty happy with how it turned out, as it’s pretty discreet and yet quite secure.
19. Can anyone download your Wall Mount for Enterprise STL files and print them for their starship?
My wall mount for Gambody’s Enterprise D model is up on Bambu’s MakerWorld for anyone to download.
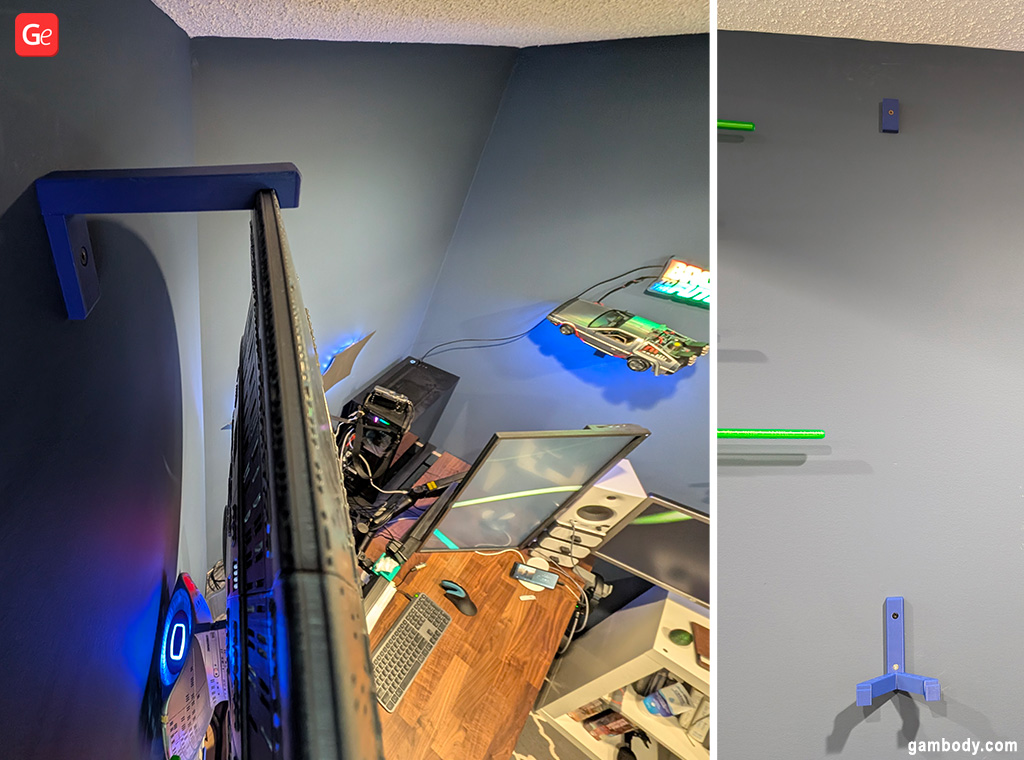

20. Where do you display your starship Enterprise models?
I work from home, and so I have a decent-sized office in my basement. Over the last year, as I’ve been 3D printing, I have slowly filled up the walls and counter spaces in my office with all sorts of fun things, including my two Enterprise models. My D is up on the wall just to my left, behind my computer screens, so I can see it all day as I work.
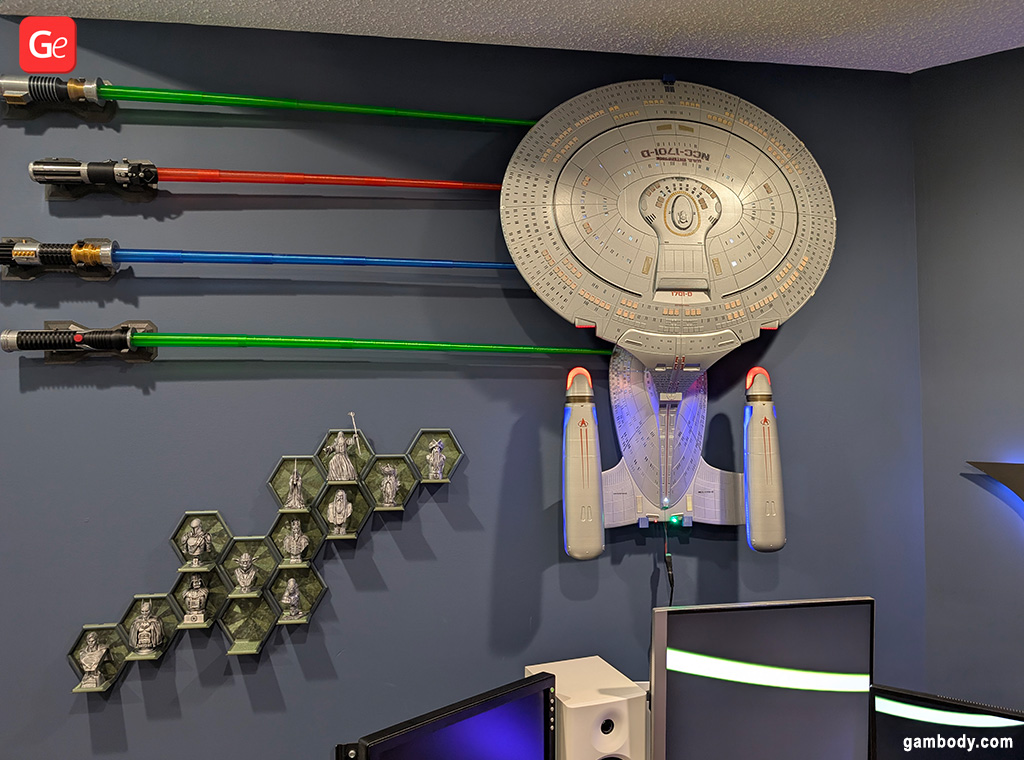

21. Do you have plans to add another Enterprise 3D print to your Star Trek collection?
I’m not quite as attached to the Original Series Enterprises, nor to the NX-01 ship, so I’m not sure I’ll invest in another Enterprise in the near future.
22. What is your current project?
I have set my sights on the amazing Millennium Falcon ship from that other well-known sci-fi franchise (Star Wars). I just recently purchased the Millennium Falcon 3D model standard building kit from Gambody, but I still need to pick up all the additional kits for the model, buy some filament, plan out my prints, and come up with an assembly and post-processing strategy. Not to mention, I need to decide where to put such a massive 3D print. I imagine this will be another 6 to 12 months’ project.
Read also: 70+ Cool Star Wars 3D Models with STL Files to 3D Print.
Gambody team would love to thank Scott Davis for his time and useful advice that might help you with 3D printing starships and figures from your favorite franchises, breathing life into them with LED lights, and enjoying your final pieces. You’ll discover many fantastic Star Trek 3D models on gambody.com, each featuring incredible detail and a striking resemblance to the original prototypes. If you need any tips or inspiration, welcome to our 3D Printing Community on Facebook. It’s a friendly place to meet other hobbyists and be motivated by their creations.
(Visited 3 times, 1 visits today)


