

OpenAI Codex CLI is an open‑source command-line tool that brings the power of OpenAI’s latest reasoning models directly to your terminal. Think of it as a lightweight AI coding assistant that lives in your shell: it can read your code, modify files, and even execute commands in your project environment. This means you can ask it to build features, fix bugs, or explain unfamiliar code without leaving your development workflow. In short, it’s chat-driven development – you interact with Codex in natural language and it responds with code edits or command results, effectively giving you ChatGPT-level reasoning plus the ability to run code and see outcomes in real-time. Sounds intriguing, right? Further in this article, I will tell you about how to access it and use for your queries.
Key Features of OpenAI Codex CLI
OpenAI Codex CLI comes with several powerful features that make it a handy companion for developers. One of the biggest advantages of Codex CLI is that it runs entirely on your local machine. Your source code and files stay in your environment and aren’t uploaded wholesale to a cloud service. Only your prompts and high-level context (like summarized diffs or relevant snippets) are sent to the OpenAI API for generating responses. Because the CLI is open-source and works locally, it gives you privacy and control by design – your workflow and code remain private. This makes Codex CLI especially appealing for codebases that you can’t or don’t want to share, while still leveraging powerful AI assistance.
By integrating directly into the terminal, Codex CLI fits naturally into a developer’s day-to-day work. You can chat with the AI assistant right next to your git commands, text editor, and build tools, which means less context-switching compared to using a separate chat interface. The tool is designed for quick iteration: ask a question or give an instruction, let it propose or apply a change, run the code, and repeat – all in one place.
Here are some of the highlights:
1. Zero-Setup Installation
Codex CLI is extremely easy to get running. All you need is Node.js and an OpenAI API key – a single command like npm install -g @openai/codex installs the CLI globally, with no other setup required. There’s no complex configuration or environment fiddling; bring your API key and it “just works”. (You can even update to the latest version at any time with a simple codex –upgrade command.)
2. Terminal-Native Design
Codex runs entirely in your terminal, so it feels like a natural extension of your shell environment. You can invoke it from your project directory and have it interact with your local files and tools. This terminal-native approach means you don’t have to switch to a browser or GUI – perfect for maintaining flow and context while coding. The CLI provides an interactive chat-like interface in text, so you see the AI’s responses (like code diffs or command outputs) right in the console.
3. Multimodal Inputs
Unlike plain text-only tools, Codex CLI accepts multimodal inputs – you can pass not just text prompts, but also images such as screenshots or diagrams to guide the assistant. For example, you could drag a screenshot of an error message or a UI sketch into the terminal, and Codex can interpret it and act on it. This is a unique capability that lets the AI use visual information to generate or edit code accordingly. Under the hood, it uses vision-enabled models to understand images, enabling use cases like debugging from a screenshot of a stack trace or building a layout from a wireframe.
4. Rich Approvals Workflow
Codex CLI gives you fine-grained control over what it can do autonomously through a rich approval system. You can choose between three modes (Suggest, Auto Edit, Full Auto) that determine whether the AI’s proposed code changes or commands are auto-executed or require your confirmation. This flexible workflow lets you decide how hands-on you want to be: you can start conservatively (manual approvals for everything) and dial up to full automation for repetitive tasks. We’ll dive deeper into these modes in the next section, but the key point is that Codex won’t make changes you’re uncomfortable with – you’re always in charge of approvals.
5. Local Execution and Privacy
All code execution and file editing happens on your machine, within your project’s environment. Aside from the model queries, nothing is sent out – the CLI doesn’t upload your codebase to OpenAI. This means you retain complete privacy. You can safely use Codex CLI on proprietary or sensitive code knowing that the tool isn’t retaining or sharing your data. Even when using the most autonomous mode, Codex runs in a sandboxed environment with no network access, ensuring any actions it takes stay local to your system. In short, you get the benefits of an AI pair programmer without giving up privacy or security.
Codex CLI Modes that You Must Know
Github Link: openai/codex
A standout feature of Codex CLI is its approval workflow – essentially, you decide how much freedom the AI has to make changes or run commands. There are three approval modes: Suggest, Auto Edit, and Full Auto. Each mode strikes a different balance between automation and user oversight, so you can pick what fits your comfort level for the task at hand. Here’s an overview of how they work:
1. Suggest Mode (Default)
This is the most conservative mode, ideal for when you want to carefully review everything. The AI can read your project files and suggest code edits or terminal commands, but it won’t apply changes or execute anything without your explicit approval . Essentially, Codex will interact with you like an expert advisor: it might propose a patch diff for a bug fix or show a shell command to run tests, and then ask for your confirmation. Use Suggest mode for safe exploration – e.g. learning a new codebase or doing a code review – where you want to see recommendations but apply them manually .
2. Auto Edit Mode
In Auto Edit, Codex is allowed to automatically apply code changes (it can edit/write to files on its own) but still must ask before running any shell commands . This mode is great for tasks like refactoring or making repetitive edits across a codebase. You get the efficiency of the AI directly modifying code for you, while retaining a checkpoint of control before any program execution. For example, Codex might rewrite a function in multiple files and save the changes immediately, but if it wants to run your test suite or start the dev server, it will pause and ask for your go-ahead. Auto Edit mode is a balance: faster coding iterations, yet you still supervise side-effects like commands .
3. Full Auto Mode
Full Auto gives the AI the most autonomy. Codex can read and write files and also execute shell commands on its own without stopping for approval . In this mode, it becomes a truly automatic agent – you could ask it to perform a complex task and then sit back while it works through the steps. To keep things safe, Full Auto runs in a restricted sandbox: all commands are executed with network access disabled and scoped to your project directory (it can’t wander outside or access the internet). This mode is ideal for longer tasks where you trust the AI to iterate, for instance, fixing a broken build or prototyping a new feature while you take a short break . Of course, you should use Full Auto with caution – it’s powerful, but you’ll want to ensure you’ve backed up or version-controlled your code (the CLI will actually warn you if you’re not in a git repo when starting Auto Edit or Full Auto) .
Comparison of Modes
The differences between the three modes are summarized in the table below, along with typical use cases for each:
In practice, you can select the mode that makes sense for your situation. By default, if you just run codex it starts in Suggest mode. To explicitly choose a mode, you can launch the CLI with a flag: for example, use –auto-edit or –full-auto to start in those modes . There’s also an interactive command (/mode) to toggle modes during a session . This way, you might begin in Suggest mode to see what Codex plans to do, then switch to Auto Edit once you’re comfortable with its suggestions, and maybe kick into Full Auto for the final stretch of a task. The important thing is that you control the level of autonomy at all times.
System Requirements for Codex CLI
Before installing Codex CLI, make sure your development environment meets the minimum requirements. The tool is cross-platform, but currently works best on Unix-like systems. Here are the minimum and recommended specs:
| Requirement | Minimum | Recommended |
| Operating System | macOS 12+ or Ubuntu 20.04+/Debian 10+ (Linux); Windows 11 via WSL2 | Latest OS updates (latest macOS or LTS Linux release; Windows with latest WSL2) for best compatibility. |
| Node.js | 22 (or newer) | Latest LTS version of Node.js (>= 22) for stability. |
| Git (optional) | 2.23+ (if using version control features) | Newest Git available (optional, but recommended for full functionality like PR helpers). |
| Memory (RAM) | 4 GB minimum | 8 GB or more (for smoother performance on large tasks). |
Codex CLI has been tested on macOS and Linux. Windows users can run it via WSL2 (Windows Subsystem for Linux) since native Windows support is still experimental . You’ll also need an OpenAI API key (from your OpenAI account) to authenticate the CLI – we’ll cover that next. Aside from these, no other special hardware is required; if you can run modern Node.js, you’re likely good to go.
Note: It’s recommended to have your project under source control (git) when using Codex CLI, especially for Auto modes. While Git isn’t strictly required to run the CLI, having version control will allow you to easily review changes and rollback if needed. In fact, Codex will remind you with a warning if you try to use Auto Edit or Full Auto in a directory that’s not a git repo
How to Use OpenAI Codex CLI?
Step 1: Install Node.js
- Download Node.js v22+ from nodejs.org.
- Install using default settings.
- Verify installation:
bash
node --version  # Should show v22+
npm --version   # Should show v10
Step 2: Install Codex CLI

bash
npm install -g @openai/codex- Troubleshooting: If you see permission denied errors:
- Windows: Run PowerShell as Administrator.
- Linux/macOS: Use sudo npm install -g @openai/codex (not recommended; fix npm permissions instead).
Step 3: Set OpenAI API Key

For PowerShell (Windows):
Powershell
$env:OPENAI_API_KEY = "your-api-key-here"To make it permanent:
Powershell
setx OPENAI_API_KEY "your-api-key-here"For Git Bash/MINGW64:
bash
export OPENAI_API_KEY="your-api-key-here"
To make it permanent, add to ~/.bash_profile:
bash
nano ~/.bash_profile # Add "export OPENAI_API_KEY=..."
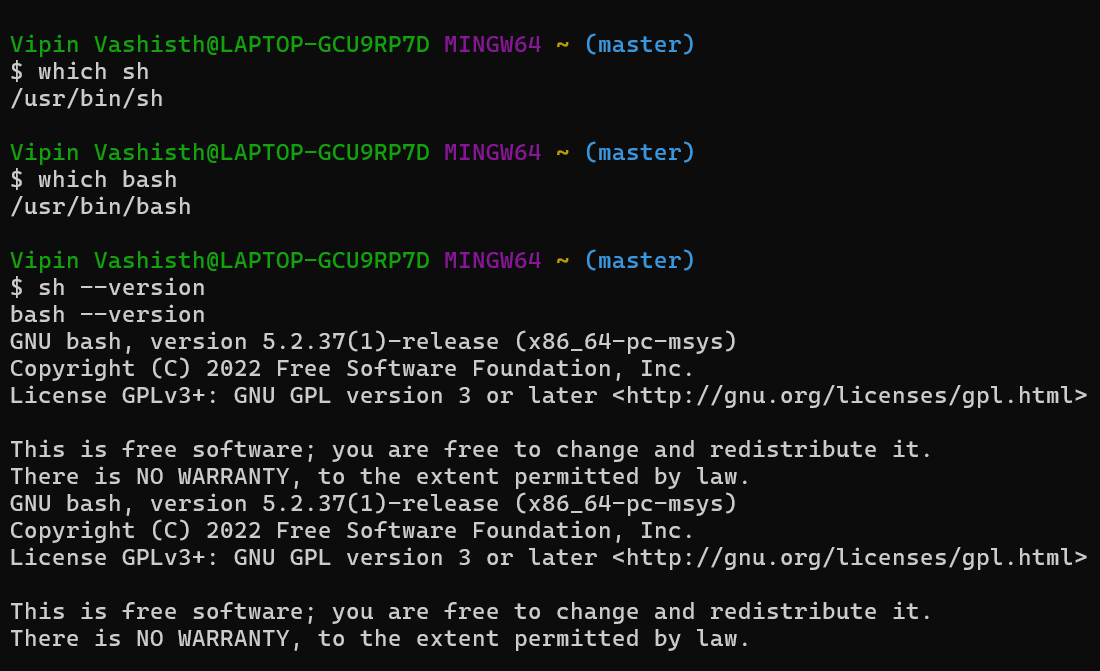
source ~/.bash_profileStep 4: Fix “sh.exe” Errors (Windows Only)
- Install Git for Windows from git-scm.com.
- During installation:
- Select “Use Git and Unix tools in the Command Prompt”.
- Enable “Enable symbolic links”.
- Restart your terminal.
Step 5: Run Codex
Interactive Mode
Run interactively:
CodexHands-on OpenAI Codex CLI to Build Game and Image Captioning App
Task 1: Basic Prompt Execution
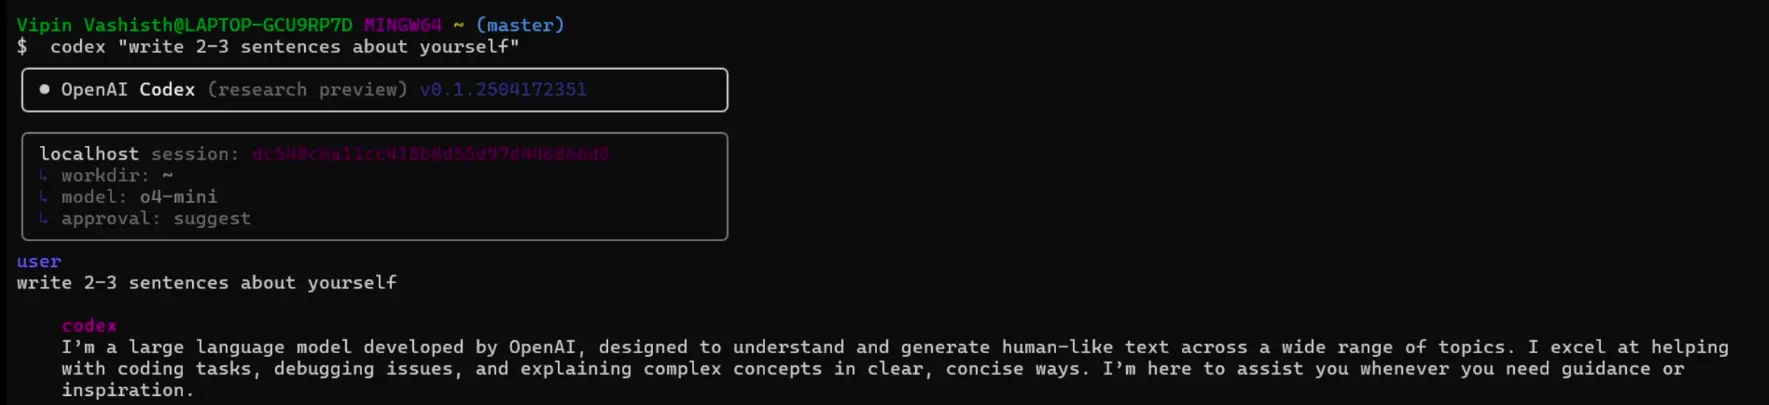
I started with a simple task—asking Codex to write 2–3 sentences about myself. The CLI responded quickly and accurately, generating coherent, grammatically sound output in just seconds. It demonstrated strong prompt understanding and fluency, even with minimal input.
Task 2: Image Captioning App with OpenAI Model
Next, I tried building a more complex application: an image captioning tool where users upload an image and receive a descriptive caption generated by an OpenAI model. While Codex provided a decent starting point, the code was outdated—referencing deprecated code and missing key components for file handling and model integration. I had to step in and update the code myself. (I’ve included a screenshot for reference.) This highlighted a limitation: for newer or less-documented APIs, Codex might fall back on older patterns or incomplete implementations.
Error with Codex CLI

Task 3: Tetris Game with Python and Pygame
Output
For the final task, I asked Codex to build a Tetris game using Python and Pygame. This time, it nailed it. The code was well-structured, fully functional, and required no major edits. The game ran smoothly and included all the core mechanics—block movement, rotation, line clearing, and scoring. A solid demonstration of Codex’s ability to handle interactive, graphics-based projects when working with well-established libraries like Pygame.
Use Cases for Codex CLI
Codex CLI can supercharge your development workflow across several common tasks:
- Bug Fixing: When you hit a bug or failing test, use Suggest mode to ask things like “Why is the login function throwing an error?” Codex analyzes the code, spots issues (like a wrong variable or missing check), and suggests fixes. You review and approve the patch. For trickier issues, Full Auto mode lets Codex fix multiple failures by iteratively running tests and applying changes. You still verify the results, but it handles the heavy lifting.
- Code Refactoring: Refactoring across files—like switching from callbacks to async/await—can be tedious. In Auto Edit mode, Codex can apply consistent changes throughout your codebase. For example, say “Refactor the API routes to async/await,” and it’ll handle the file edits, pausing only if needed. You supervise the changes via diffs, letting Codex do the grunt work while you oversee quality.
- Learning a New Codebase: Just cloned a repo? Use Suggest mode to ask, “What does the Scheduler class do?” or “How does authentication work?” Codex reads the code and explains in plain language, helping you navigate unfamiliar projects quickly. You can request summaries, understand module responsibilities, and explore functionality without making changes.
- Prototyping and Scaffolding: Want to kickstart a new project or feature? Full Auto mode can generate code and set everything up. Ask it to “Create a simple TODO web app in Flask,” and it’ll generate files, install dependencies, and run the app—automatically. For new features like “Add CSV export to this CLI tool,” Codex writes and integrates the code, giving you a working baseline to build on.
Codex CLI acts like an AI pair-programmer—helping with everything from mundane edits to complex automation. You control how hands-on or autonomous it is, depending on the task.
Conclusion
With the OpenAI Codex CLI, developers gain a friendly AI partner right in the terminal – one that can reason about code and handle the mechanics of editing and running it. I have covered what Codex CLI is and how it works, from its zero-effort installation to the clever approval modes that keep you in control. You’ve seen how to get started and run some basic commands, and how it can help in real-world use cases like fixing bugs, refactoring, learning codebases, and prototyping new ideas. In essence, Codex CLI brings the ChatGPT experience into your development environment, turning natural language instructions into working code, all while you remain in charge. It’s an exciting tool that embodies the future of AI-assisted software development: fast, flexible, and built with developer empowerment in mind. Give it a try on your next project!
Hi, I am Pankaj Singh Negi – Senior Content Editor | Passionate about storytelling and crafting compelling narratives that transform ideas into impactful content. I love reading about technology revolutionizing our lifestyle.
Login to continue reading and enjoy expert-curated content.
