

38.9K
Welcome to the world of FPV (First Person View) drones! This comprehensive tutorial is designed to guide you through the fascinating and adrenaline-filled journey of building, flying, and tuning FPV drones. Whether you’re interested in racing, freestyle flying, or simply exploring the sky from a unique perspective, this tutorial will provide you with valuable insights and practical advice to help you get started. From understanding the essential components and selecting the right gear to learning how to fly safely and optimizing your drone’s performance, we’ve got you covered. Let’s embark on this exciting adventure together and discover the limitless possibilities of FPV drone flying!


Some of the links on this page are affiliate links. I receive a commission (at no extra cost to you) if you make a purchase after clicking on one of these affiliate links. This helps support the free content for the community on this website. Please read our Affiliate Link Policy for more information.
TL;DR: Steps for Getting into FPV Drones
While I highly encourage you to go through the entire tutorial for an in-depth understanding, here’s a summarized roadmap to help you get started in flying FPV drones.
If you ever need assistance or guidance, don’t hesitate to reach out. Leave a comment below, search online, or join our forum IntoFPV (https://intoFPV.com). Consulting with experienced pilots and having them review your parts list before ordering can help you avoid costly mistakes and save money as you progress.
This guide will teach you to build, maintain, and repair your FPV drone, as well as how to fly and tune it for optimal performance. Building and flying an FPV drone is a rewarding technical hobby, providing opportunity to gain new skills in electronics, mechanics, and software, along with engaging in creative problem-solving.
What Is An FPV Drone?
If you’re new to drone flying, the term “FPV drone” might not match the typical image you have in mind. Most people are familiar with DJI camera drones, primarily designed for capturing aerial photos and videos. FPV drones might not look as streamlined, but they are usually made from carbon fibre and metal pars that enhances durability and ease of maintenance.
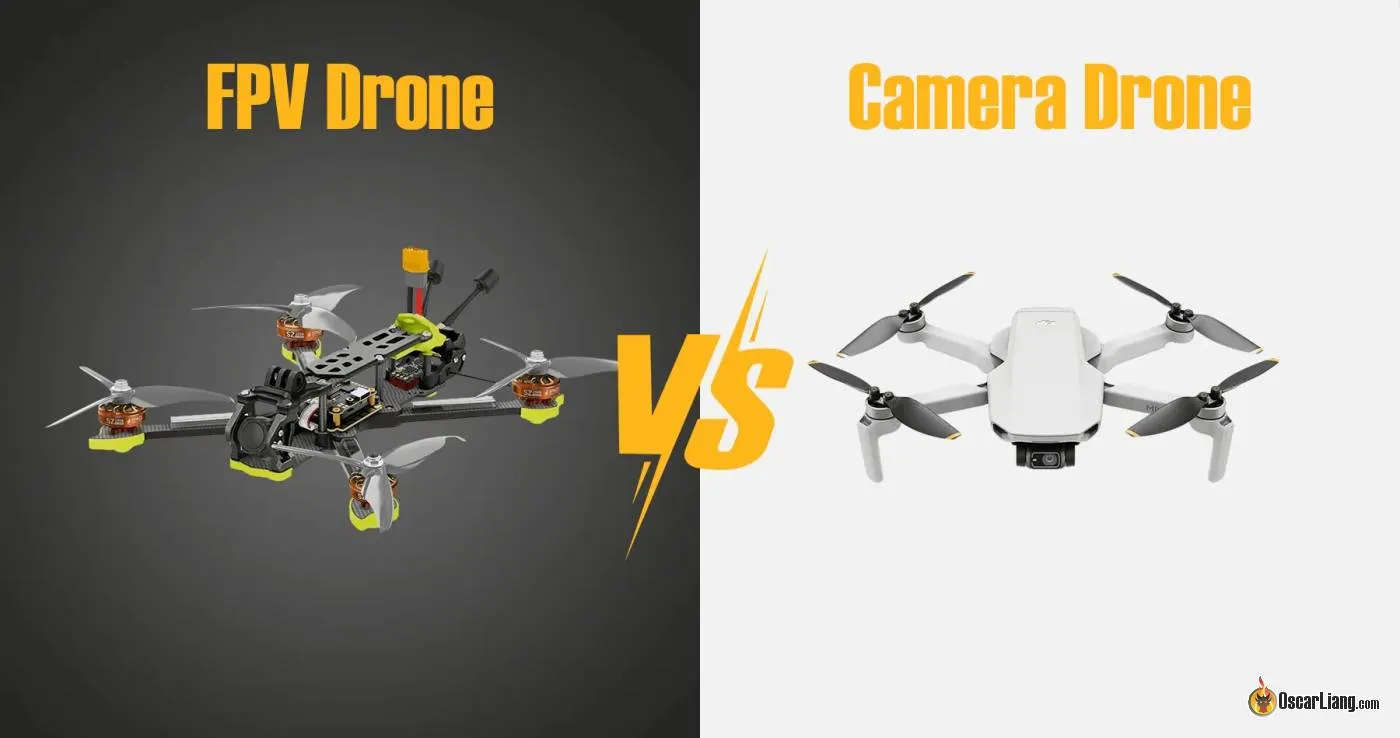
FPV Drone vs Camera Drone
FPV stands for First Person View, meaning the drone pilot sees exactly what the drone’s camera sees in real-time, through specialized video goggles. This immersive perspective feels as though you’re sitting in the cockpit, allowing for incredibly precise and dynamic control. In contrast, traditional camera drones are usually flown line-of-sight or by viewing a smartphone screen displaying the drone’s camera feed. While the average person can quickly learn to fly a camera drone, mastering FPV drones involves a much steeper and more technical learning curve.
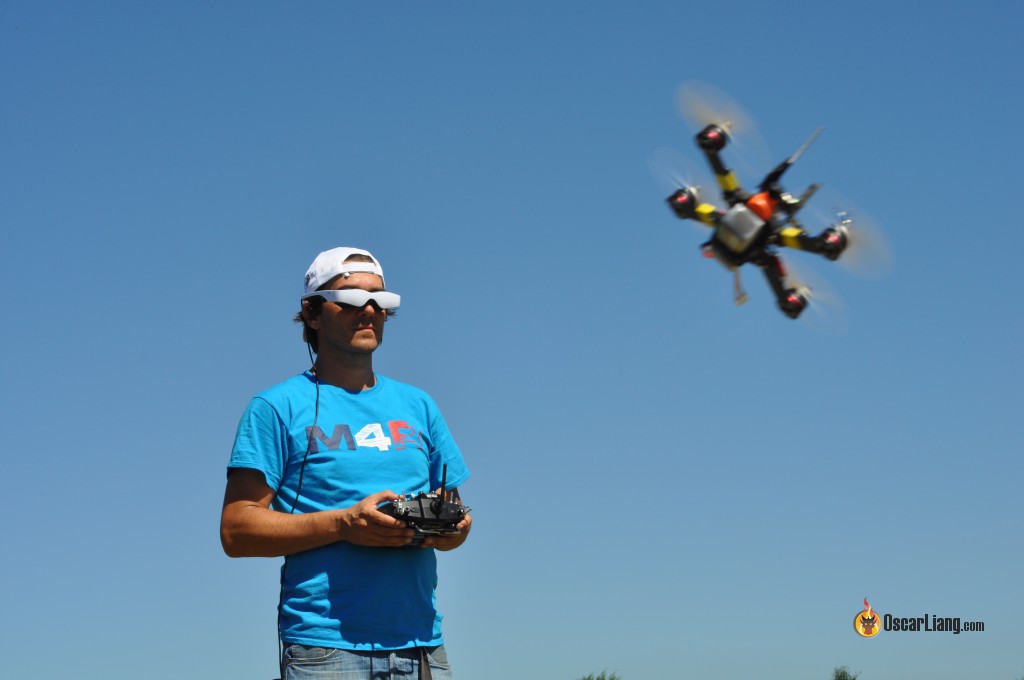
Flying an FPV Drone using goggles, you can see what the drone sees
FPV drones are popular for racing and exploration flying, as the pilot can navigate through small gaps and obstacles, and perform aerial maneuvers with greater precision and control than with a traditional line-of-sight view. They are also ideal for capturing stunning aerial photography and videography, providing unique and cinematic footage that would be impossible to achieve with other camera types.
FPV flying requires intense focus, and the speed and agility of an FPV drone make it a truly sensational experience. It’s almost like playing a video game, except crashing has real-world consequences – such as damaging an expensive FPV drone that can cost as much as a new PlayStation!
While some FPV drone pilots fly professionally in racing or videography, the majority fly FPV on their days off as a hobby. The FPV drone community is supportive and enthusiastic, creating a welcoming environment for like-minded individuals to connect and share knowledge.

A group of friends racing together in a park
How Much Does an FPV Drone Cost?
Getting into FPV drones is comparable in cost to DJI camera drones. Here’s a rough breakdown of the expenses involved in building a basic FPV drone and acquiring all the necessary equipment:
- Radio controller + FPV Simulators: US$100-$300
- FPV Goggles: US$100-$500
- FPV Drone: US$100-$500
- Batteries, charger, antennas and other accessories: US$100-$500
The total cost of building and flying an FPV drone can range from approximately $400 to $1,800, depending on the quality and performance of the components you select. I have provided an example of one of the most affordable yet decent-quality builds you can achieve in 2025 in this post.
If the idea of building a drone from scratch seems overwhelming, there are complete ready-to-fly bundles available. These packages include all the parts needed to start flying, and while they may have lower quality and fewer features, they are a good way to get started without breaking the bank. I will discuss this option in greater detail later in this article.
Pick a Radio
Before buying a drone, invest in a decent radio and practice flying in an FPV drone simulator. Simulators can teach you the basics of flying without the risk of crashing your expensive drone.
Select a remote that fits your budget and use it to practice in FPV drone simulators. The same remote can later be used with a real drone, allowing your skills to transfer seamlessly to the real world.
There are a few things to consider when picking up a radio:
- Shape:
- Full Size, Box style
- Gamepad style
- Screen:
- Black and White
- Color (often touch screen)
- Price, color, ergonomics, etc…
Once you’ve decided on what shape and screen you like, you are usually down to 2 to 3 options which makes it much easier to choose.
I highly recommend opting for one that supports the ExpressLRS (ELRS) 2.4GHz radio link. This is currently the most popular and powerful radio link in the hobby, ensuring excellent value and performance. Majority of the pre-built FPV drones support this radio link out of the box.
Check out my radio recommendations in this post—all of them support simulators straight out of the box.
Choosing the Best Radio Transmitter for Your FPV Drone: A Beginner’s Guide
Avoid using Xbox controllers or keyboards, as they won’t provide the same benefits. Using a proper radio controller will help you build muscle memory and ensure you get the most out of your training.
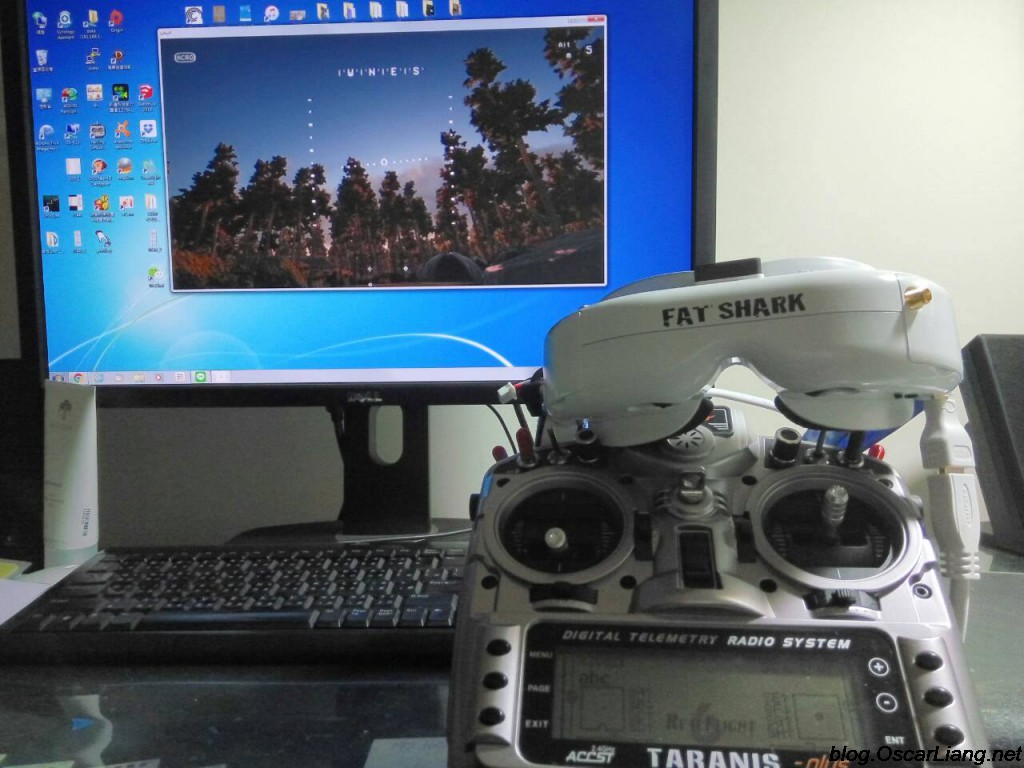
Practice in Simulators
Get a taste of flying FPV without a real drone – try a simulator
Some would suggest flying a small drone like a “tiny whoop” to get started, but in my opinion it’s more expensive because you have to buy all the gears that you don’t even know if you are going to use again in the future. And crashes means you could damage your drone.
Learning to fly an FPV drone in a simulator is the best way to get started and improve your skills without damaging your real drone or causing injury. It’s safe and cost effective, I strongly recommend getting some flight time in a simulator (ideally 10+ hours) before buying or building your first drone.
Simulators can teach you the basic controls of an FPV drone and help you develop the muscle memory your hands need.
It really doesn’t matter which simulator you choose, they can all teach you how to fly. These days, they all feel pretty realistic when it comes to physics. It won’t be 100% like real life, but it’s close enough. The main differences in these simulators are the graphics and content.
At the beginning, your goal is try to master the basic controls in the simulator, fly through gaps and avoid obstacles and not to crash. As you progress, you can start learning advanced maneuvers and techniques, such as flips, rolls, and freestyle moves.
Here is a list of FPV simulators:
FPV sims are all excellent in their own ways. If you have a decent gaming PC I’d probably recommend Liftoff and Tryp, and if you have a low spec PC, then Velocidrone is more likely to work better. Most of these simulators have built-in tutorials to help you learn how to get started as a complete beginner, which is what you really need.
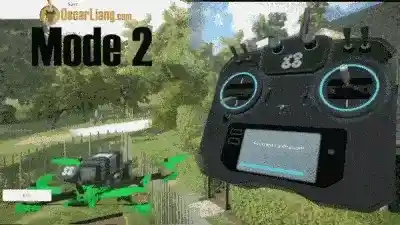
Basic FPV Drone Control Explained
FPV drones are controlled using a remote control (a.k.a. radio transmitter). The movements of the drone is controlled by the two sticks on the remote, which these sticks are often referred to as “gimbals”.
Left Stick (Throttle and Yaw):
- Throttle: This stick controls how fast the motors spin. Push it up, and the motors spin faster; pull it down, and the motors slow down. It’s all about controlling the speed of the drone’s motors.
- Yaw: Moving this stick left or right makes the drone rotate left or right. Think of it as the drone turning its head to look around.
Right Stick (Pitch and Roll):
- Pitch: Pushing this stick forward makes the drone tilt and move forward. Pulling it back does the opposite, making the drone tilt back and fly backward.
- Roll: Moving this stick to the left or right makes the drone lean and move in that direction. It’s like tilting your body to the left or right when you’re trying to balance.
The Types of FPV Drone
What is a drone?
In the world of RC flying, a drone is typically a quadcopter—an aircraft with four propellers, so people often call them “quads” as well. While it’s unclear exactly when the media popularized the term “drone”, it’s become the go-to word for any unmanned aircraft, so we just roll with it.
Today, the term “drone” is widely used to describe any remotely piloted aircraft, especially those equipped with cameras—even if the camera isn’t always required to earn the title.
Outside of military applications, drones first gained popularity for aerial photography and videography. These early models were often large and built to carry heavy camera gear.
In the FPV hobbyist space, drones come in many forms. Here’s a quick list of the most common types you’ll see in the hobby: https://oscarliang.com/types-of-drones/
What is a multirotor?
Multirotor (or multicopter) refers to any “copter” with more than one main motor or propeller. For example, a tricopter has 3 motors/rotors, a quadcopter has 4, a hexacopter has 6, an octocopter has 8, and so on. They all fall under the “multirotor” category.
Here are the different configurations of multirotors.
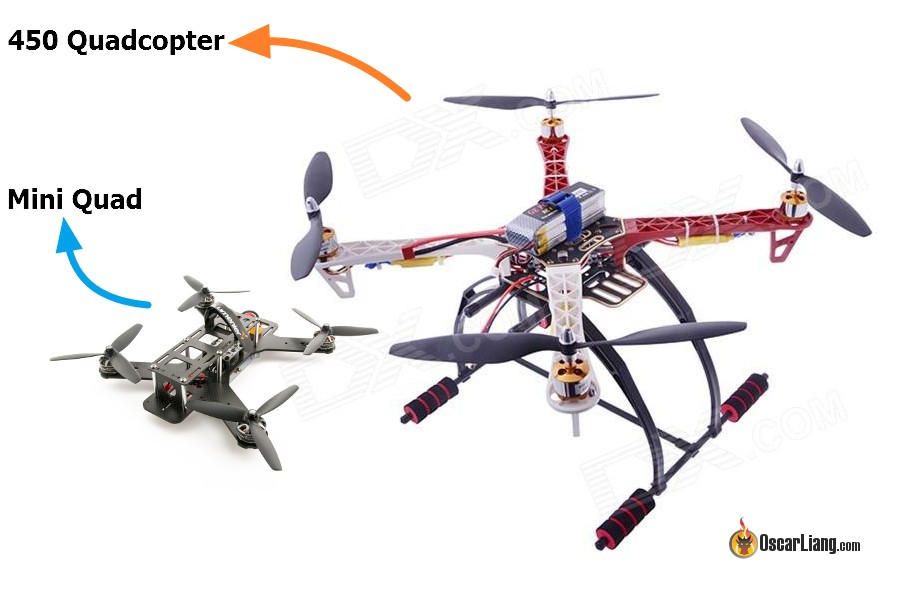
Drone Sizes and Types
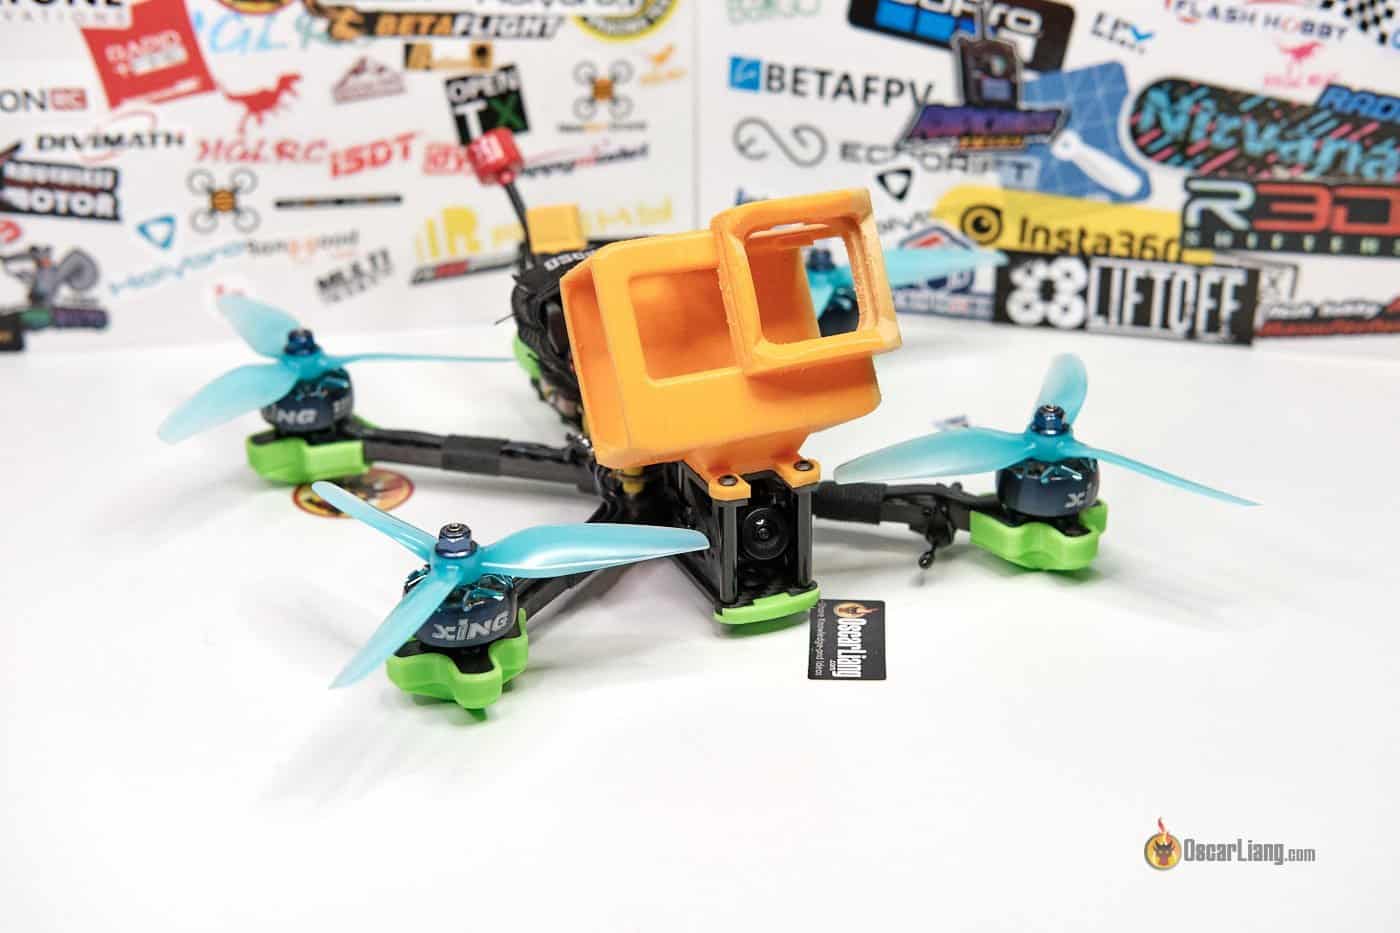
5-Inch

5-inch FPV drones are arguably the most popular drone size. It’s versatile, with a great balance between power, efficiency, and agility. They are suitable for almost everything: freestyle, racing, and even long-range flying. Components are widely available and easy to work with. They can carry an action cameras like GoPros. A typical 5″ FPV drone weighs around 500g-700g, including the battery, and has an average top speed of 150km/h.
I have a tutorial to show you how to build a 5″ FPV drone from scratch: https://oscarliang.com/how-to-build-fpv-drone/
4-Inch

4-inch drones gained popularity due to the legal 250g weight limit introduced in some countries, because 4″ is the biggest drone size that can still comfortably achieve this weight limit without giving up too much performance.
2-Inch, 2.5-inch and 3-Inch

2-inch and 3-inch drones are popular because of their small size and decent performance. They can do nearly anything a 5-inch drone can do, except for carrying a GoPro, and they usually meets the sub250 weight limit.
Tiny Whoops

Tiny Whoops are small, ducted FPV drones designed for indoor flying. They are lightweight (around 20g to 30g including battery), easy to fly, and relatively inexpensive. Their built-in prop guards (or “ducts”) protect people and objects from the propellers. On the flip side, the ducts make them heavier and reduces performance, making them less ideal for outside use and windy condition.
Here are what I think the best tiny whoops currently on the market.
6 Inch and 7 Inch

6-inch and 7-inch drones can have a higher top speed and can carry more payload than a typical 5″ drone, such as a larger battery, therefore they are suitable for long range. However they tend to carry more momentum and are not as agile as the smaller 5″, therefore they are not as popular for freestyle and racing.
X-Class and Beast Class

X-class and Beast class drones are the largest and most powerful in this list, and are not recommended for beginners due to their high cost, maintenance, and potential danger. X-class drones have frame sizes between 800mm-1200mm and use 9-13 inch propellers, while Beast class drones use sub-800mm frames. Both classes are typically used for racing or high-performance flying.
Ultralight (toothpick)

Ultralight drones are small, light, and designed for performance. Because their skinny frames look like a bunch of toothpicks tied together, these drones are also called “toothpicks”. You can find toothpick style drones in various sizes, from 5inch to 1.6inch. They are not made for crashes, but for pure performance by making them as light weight as possible. I have a tutorial explaining the considerations that go into choosing parts for a Toothpick build. You can buy one pre-built and I tested a bunch to find out which is the best.
Cinewhoops
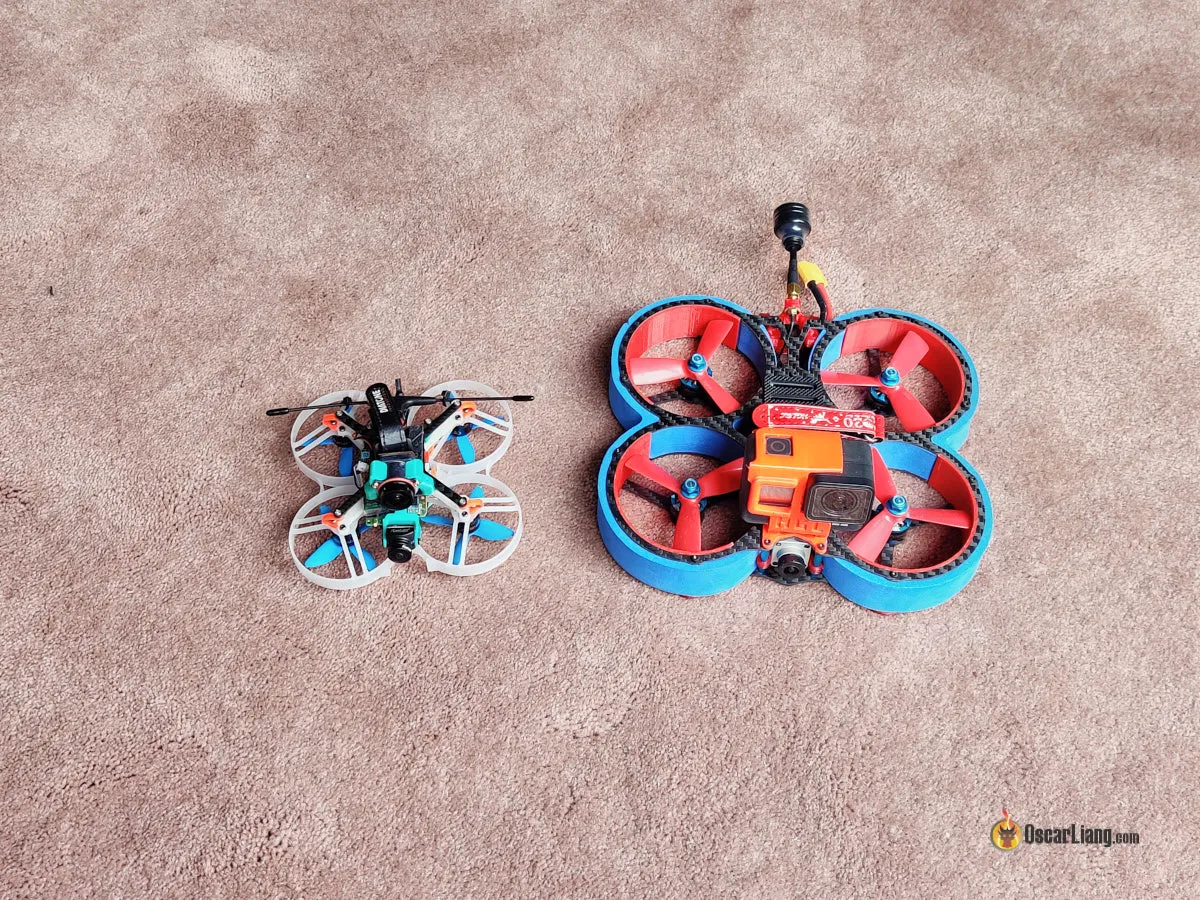
Cinewhoops are 3″ or smaller drones with propeller guards (ducts) designed for capturing cinematic footage with an HD camera like a GoPro. They are meant for slow, smooth flights and not for freestyle or acro flying, and they are safe for indoor flying.
Learn more about cinewhoop in this post: https://oscarliang.com/cinewhoop/
Cinelifter
Cinelifter drones are octocopters in X8 configuration (looks like a quadcopter but each arm is equipped with two motors), usually running 6-8″ propellers. They are designed to carry high-end cameras for professional shooting.
What size is right for you?
For beginners, a 5″ FPV drone is highly recommended due to its versatility in flying style, it can do almost everything: freestyle, racing and cinemaphotography. It’s powerful enough to carry a GoPro and is the most popular size, making it easier to find help and support online. However, a 5inch drone is very powerful and can be intimidating to beginners, so many prefer to start with something smaller. But once you master flying a 5inch, you should be able to fly almost any other types of FPV drones quite comfortably. Ultimately, the size of the drone you choose will depend on your flying preferences and goals, as well as the regulations and restrictions in your area.
Identify Your Flying Style
Before choosing what type of drone you want to build or buy, it’s essential to identify your goals in flying FPV and understand your flying style. The common flying styles in FPV are:
- Freestyle
- Racing
- Long range
- Cinematic (Cinemaphotography)
Freestyle
Freestyle is probably the most popular style of FPV. Freestyle flying is all about control, spatial awareness, creativity, tricks, and maneuvers. There are no rules to how you can fly, so the sky is the limit (and the ground, so try not to crash!).
For freestyle flying, prioritize durability and responsiveness. Choose motors with high torque, ESCs with sufficient current handling capabilities, and frames with strong materials and a robust design.
Racing

FPV racing involves competing against other pilots on a designated course with gates and flags. Speed, agility, and durability are crucial in racing.
Opt for lightweight frames with minimalist design, powerful motors, and ESCs that can handle high current. Low-latency FPV system with adjustable power output are also crucial. Additionally, a high performance radio link with low latency and high refresh rate are important to maintain precise and reliable control at high speeds.
Long Range

Long-range flying aims to cover great distances while maintaining a low-key, efficient cruising style. Efficiency and reliability are key for this type of flying. Here are some tips to long range flying.
Choose motors with lower KV ratings for better efficiency, and use larger capacity LiPo or Li-ion batteries to extend flight time. Using GPS module is highly recommended in long range flying as it allows you to monitor distance and location of your drone, and “return to home” feature might be able to bring your drone home when you lose signal. Long-range capable radio systems like Crossfire and ExpressLRS are recommended to ensure a strong signal even at great distances.
Cinematic

Cinemaphotography, or Cinematic FPV flying focuses on capturing smooth, stable footage in epic locations, without too many acrobatic moves. The ideal build for cinematic flying depends on the specific job.
Consider using drones specifically designed for this purpose, such as Cinewhoops for indoor, or 5″-7″ freestyle builds for outdoor. In windy conditions, consider larger drones as they can provide more stability, while smaller drones can fly through tight spaces for unique shots.
FPV Drone Kits for Beginners
Getting started in the FPV hobby can be expensive, but there are affordable ready-to-fly (RTF) kits available that include everything you need to begin your journey. These kits are a great way to test the waters without investing a fortune upfront.
One example of a well-rounded, beginner-friendly FPV kit is the BetaFPV Cetus X FPV Kit. This kit includes a drone, radio, FPV goggles, battery, and charger. Before taking your drone to the skies, you can use the included radio controller to practice flying in FPV simulators like DRL, Liftoff, and Velocidrone. Once you’re comfortable in the simulator, you can try flying the Cetus micro drone in the house or local parks.

The HGLRC Draknight is another great option. This drone is more advanced, and offers excellent performance and value for mainly outdoor flying, and you can continue using the same FPV setup for future builds.

It’s important to note that while RTF kits provide a budget-friendly entry point, they often include lower-quality goggles and radio controllers with limited features. As you progress in the hobby, you may outgrow these components and need to invest in better equipment.
If you’re confident that you’ll stick with the FPV hobby and have the budget to do so, consider purchasing higher-quality goggles and radio controllers from the beginning. This way, you can avoid the need to replace them as you advance in the hobby, ultimately saving money and enhancing your flying experience from the start.
If budget isn’t a concern and you’re looking for a hassle-free FPV experience, the DJI Avata 2 kit is actually a fantastic option.

It’s beginner-friendly and ready to fly straight out of the box. Features like emergency braking and return-to-home can be genuine lifesavers, especially if you’re new to flying. That said, keep in mind that the Avata 2 locks you into DJI’s ecosystem, and repairs can be difficult—if not impossible—due to its complex, integrated design.
It’s also not built to withstand crashes, so it’s essential to start in Normal Mode and spend plenty of time in simulators before attempting Manual Mode. Overall, it’s a great choice for those who want a quick, reliable start in FPV without much tinkering. Check out my full review: https://oscarliang.com/dji-avata-2/
Should You Build or Buy Your First FPV Drone?
Tiny Whoop is great as your first drone. Once you’re comfortable with a Tiny Whoop, you can transition to larger quads like a 3.5-inch or even 5-inch freestyle drone. A 3.5-inch quad offers a similar experience to a 5-inch but is less intimidating and easier to handle. Building your own 5-inch freestyle quad is also a great way to learn the inner workings of FPV drones.
Build Your First FPV Drone?
Building your first drone has several benefits:
- Experience and Skills: Gaining hands-on experience with drone components and assembly will enable you to diagnose, repair, and upgrade your drone in the future.
- Budget: Building your own drone can be more cost-effective because you are not paying someone to build it for you. However, it’s less appealing if you don’t have the necessary tools like a soldering iron or screwdrivers.
- Customization: By choosing your own parts, you can tailor your drone to your specific preferences and needs. But it can be daunting if you have no idea what components to get.
While there are affordable DIY kits available such as the Eachine Tyro79, they may be lower in quality. If you prefer higher-quality components, you can purchase parts separately and follow expert recommendations.
Buy a Pre-Built FPV Drone?
If you’d rather spend more time flying and less time building, a pre-built drone might be a better choice. Keep in mind that the closer a pre-built drone is to “perfect”, the more expensive it will be (not always true, but most of the times it is). And if you break it, you’ll likely need to learn how to solder and repair it anyway. With pre-built drones, there’s a risk of getting a subpar product. Some manufacturers might use outdated electronics to save costs. Research is key here. You might think pre-built drones are the obvious choice for beginners, but I beg to differ. Building your own drone is a valuable skill, especially for making repairs or customizations. However, diving into building without any prior experience can be overwhelming.
FPV System Components
![]()
The FPV (First Person View) system is a crucial aspect of an FPV drone, providing the pilot with a real-time video feed from the drone’s perspective.
There are four main components involved in an FPV system:
- FPV Camera: Mounted on the drone, the FPV camera captures the live video footage of the drone’s surroundings.
- Video Transmitter (VTX): The video transmitter takes the video feed from the FPV camera and broadcasts it wirelessly on a specific frequency.
- FPV Goggles (with Video Receiver): The pilot wears FPV goggles, which receive the video feed from the VTX and display it on built-in screens. The video receiver (VRX) can either be integrated into the goggles or added as an external module.
- Antennas: Antennas play a vital role in the FPV system, as they help transmit and receive the video signal between the VTX and VRX. High-quality antennas can improve the range, signal quality, and reliability of your FPV system.
FPV System Options

There are 4 popular FPV systems available, come with their own set of advantages and drawbacks, including cost, image quality, and latency.
- Analog: It was the standard in the FPV community for many years. Analog is generally more affordable and offer low latency. The smaller size and lighter weight of analog components make them more suitable for micro FPV drones, such as Tiny Whoops. However, analog video quality is the least desired, often suffering from static and breakups throughout the flight.
- DJI: Most expensive but also offers the best image and transmission quality.
- Walksnail: Often considered the alternative to DJI, but image quality isn’t as good as DJI.
- HDZero: Praised for its low latency, popular in racing, but image quality is not as good as DJI and Walksnail.
To learn more about the different FPV system, check out my buyer’s guide: https://oscarliang.com/fpv-system/
Parts and Equipment
Before diving in, make sure to read:
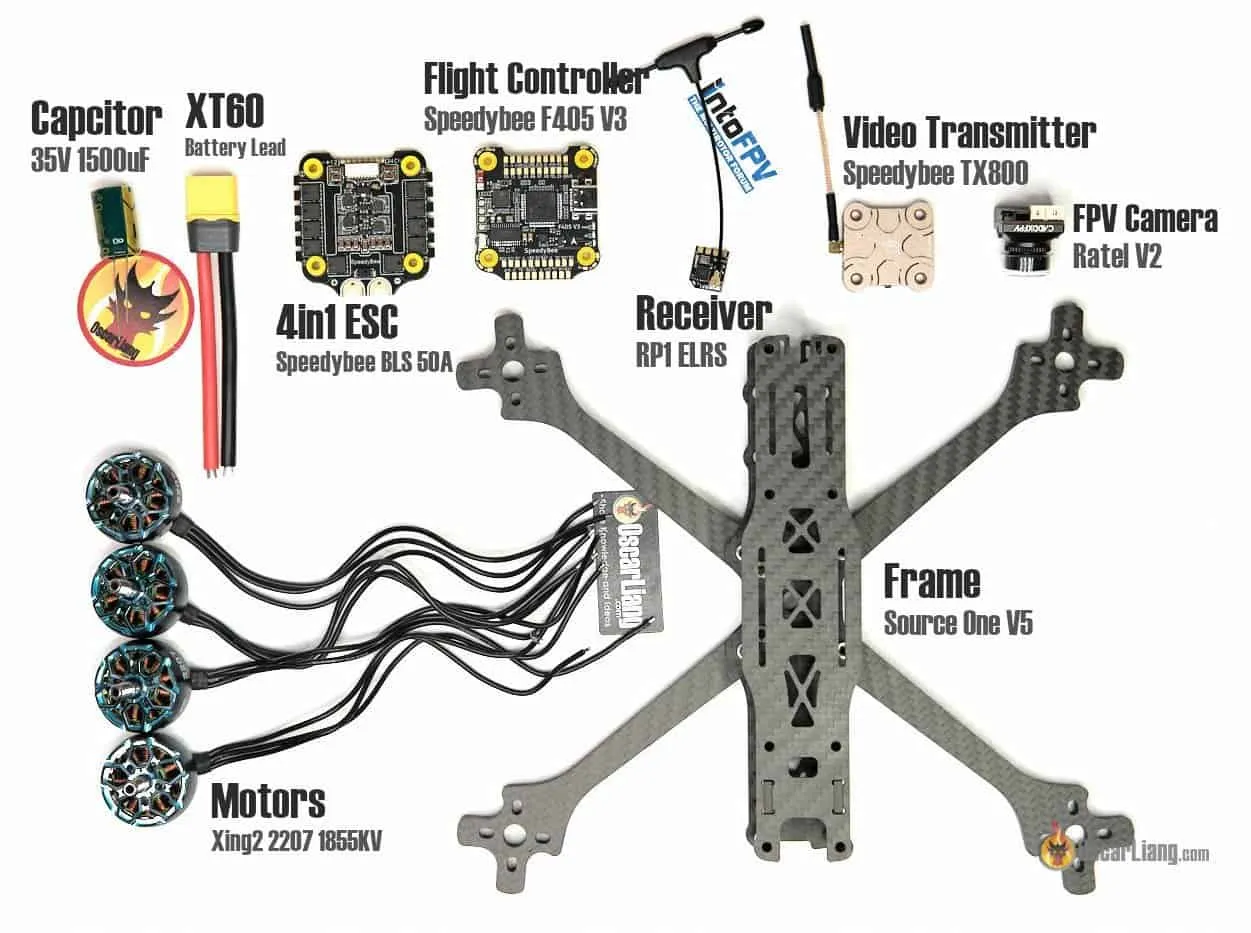
Here is the anatomy of an FPV drone:

An FPV drone consists of the following parts, with buyer’s guides for each component:
To fly your quadcopter in FPV, you will also need the following equipment:
You will also need some of these essential tools for building:
For a complete list of tools check out this post: https://oscarliang.com/fpv-tools/
Choosing Components
![]()
Selecting the right components for your first build can be challenging. If you’re unsure, consider using popular components to ensure more available support if you encounter issues. Do your research, and don’t hesitate to ask for help on forums like IntoFPV.
To give you an idea, check out the gear I use and the quads I fly.
To avoid hardware incompatibility, consider following someone else’s parts list. Hardware compatibility primarily depends on mounting sizes, which vary for different components like FCs/ESCs, cameras, motors, and propellers.
FC/ESC Sizes:
Flight controllers (FCs) and electronic speed controllers (ESCs) come in three main sizes:
- 30.5×30.5mm
- 20x20mm
- 25.5×25.5mm

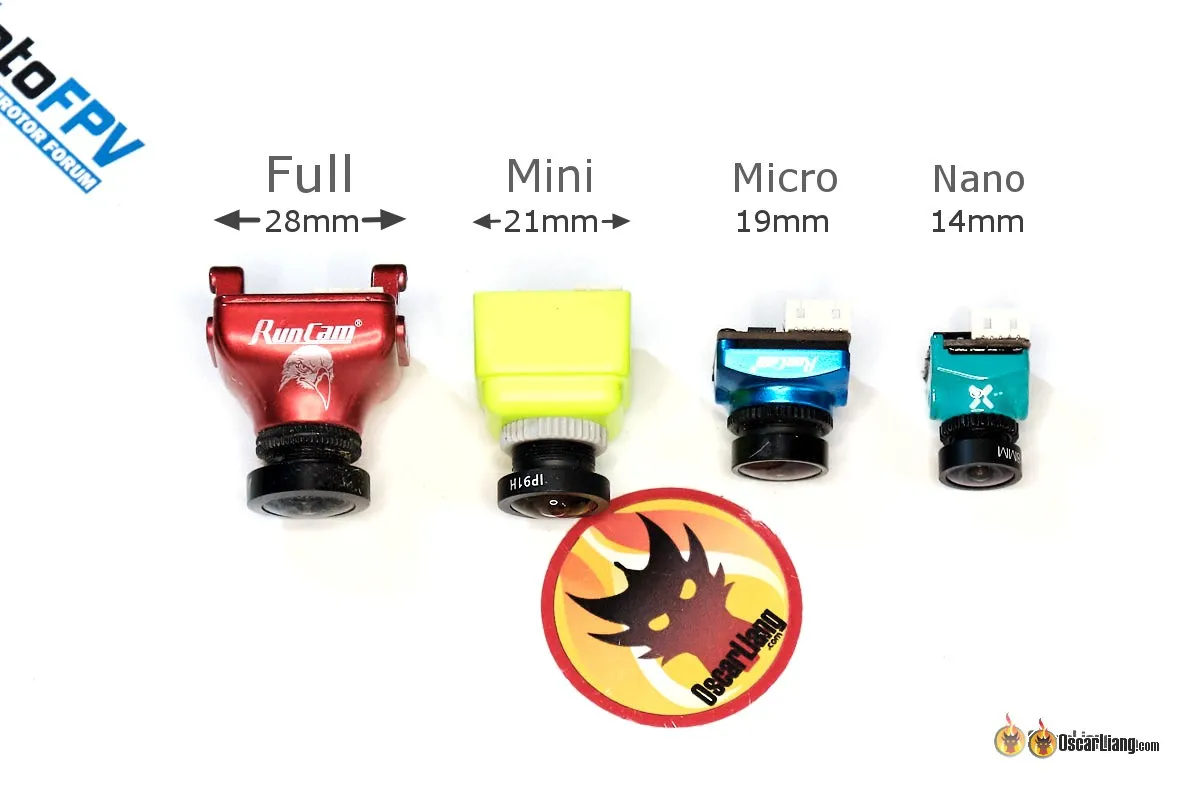
FPV Camera Sizes:
FPV cameras have different widths, such as:
- Full size (28mm)
- Mini (21mm)
- DJI OG Cam (20mm)
- Micro (19mm)
- Nano (14mm)
The camera size you need depends on your frame’s compatibility. You can mount other camera sizes using 3D printed camera holders.
Motor Mounting Sizes:
Motor base mounting sizes typically use four screws in a square or triangle pattern. Common sizes include:
- 19mm (7″ quads)
- 16mm (5″ quads)
- 12mm (Ultralight 5″ or heavier 3″, 4″ quads)
- 9mm (3-4″ toothpicks)
- Triangle pattern, 6.6mm spacing (whoops/tiny <2″ quads)

Propeller Mount Types:
Propeller mounts on motors vary by size:
- M5 threaded shaft (5″ or larger quads)
- T-Mount (1.5 or 2mm shaft with two M2 holes on each side) (micro quads)
- Push-on 1 or 1.5mm shaft (tinywhoops/<2″ quads)
[xxx image props sizing diagram]
For smaller components like radio receivers, video transmitters, buzzers, and capacitors, mounting is more flexible and situational. Use materials like zip ties and double-sided tape to secure them in place.
Ensure electronic parts have compatible voltage ratings. Most components can handle either 5V or battery voltage (e.g., 7V – 36V or listed as a cell count like 2S to 6S). Overvolting can damage components and potentially cause a fire.
Invest in the Right Accessories
FPV flying requires more than just a drone, radio, and goggles. Accessories make a huge difference in your experience.
Getting LiPo Batteries and Charger
For LiPo batteries, typically a 4S 1500mAh (or 6S 1100mAh) on a 5″ drone would give you 5 to 7 minutes of flight time. You can start with a set of 4 batteries for practicing, but you will probably need more later on as you improve and want to fly longer.
Getting a Backpack
Protect your gear and keep everything organized. Brands like Torvol and Lowepro offer excellent options. It also make it easier to carry your drones and all your gear for flying, consider getting a backpack designed specifically for FPV gear. These backpacks are designed with compartments and straps to securely hold your drones, radio, goggles, batteries, and other accessories.
Backpack Recommendations: https://oscarliang.com/?s=fpv+backpack
3D Printer
Although optional, many pilots use 3D printers to create custom mounts, protectors, and other parts. Check out my guide to 3D printer for FPV pilots: https://oscarliang.com/3d-printer/
Software Setup
After finishing your build, you’d want to configure the drone before flight. There are two components you want to configure: the flight controller and the ESC. You will need to download two different software programs to configure them because they are running different firmware.
I have tutorials that dive into detail on how to do software setup. Just do a search on my blog, or follow instructions in one of my build guides. For example, this guide for Betaflight: https://oscarliang.com/betaflight-firmware-setup/
The most popular flight controller firmware is Betaflight, and the most popular ESC firmware is BLHeli_S or BLHeli_32, depending on the hardware you have. You can’t go wrong with these choices. Anyway, here I will give you an overview of the firmware we use in the hobby.
FC Firmware
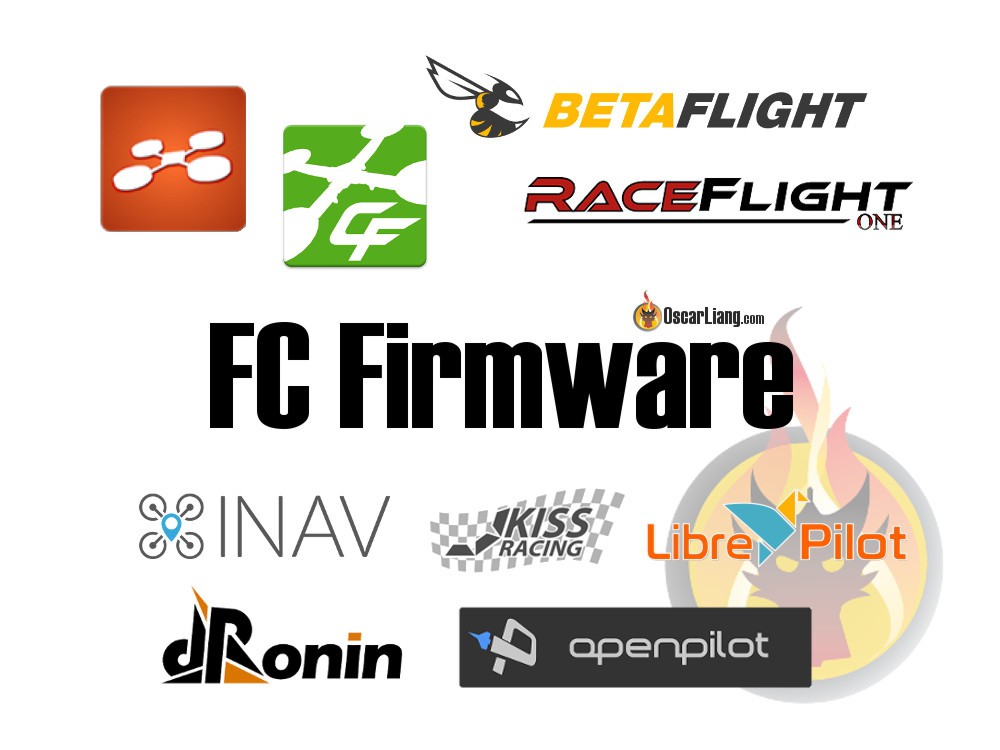
There are quite a few flight controller firmware options available for FPV drones, but it doesn’t matter – just use Betaflight. That’s what the vast majority of the people in the hobby use. It’s free, open-source, performs extremely well, and is updated frequently. It has a huge selection of flight controller available. Apart from freestyle and racing, Betaflight has added features geared for long-range such as GPS Rescue Mode (similar to Return to Home).
KISS (closed source) is another firmware that is easy to set up and flies well. You will need to purchase KISS-specific hardware to use their firmware.
iNAV (open source) is also very popular with long-range and autonomous flyers. They do not support as many flight controllers. Apart from multirotor it also support fixed wing aircraft.
ESC Firmware
Every ESC has its own processor, and there is “ESC firmware” running on it. The language spoken between the flight controller and ESCs is called “ESC Protocol.”
The most popular firmware which runs on 99% of all FPV quad ESCs are either BLHeli_S or BLHeli32. BLHeli32 is newer of the two and uses a faster processor. Flight performance-wise, there is very little difference, but BLHeli32 is more future-proof.
The main ESC protocol used today is DShot, more specifically, DShot300 and DShot600, with the number indicating the speed of the protocol.
Check out this post to learn more about ESC firmware and protocols.
How Does an FPV Drone Work?
![]()
Here’s a brief overview of how the various components work together in an FPV Drone:
- The pilot controls the drone using a radio controller with two joysticks. The stick commands are sent wirelessly to the radio receiver installed inside the drone.
- The FC (flight controller) takes commands from the RX (radio receiver), combines them with data from the gyro sensor, and calculates the speed at which each motor should move.
- The ESC (Electronic Speed Controller) converts the signal from the FC and adjust motor speed to generate the desired thrust.
- A drone is typically powered by a LiPo (Lithium Polymer) battery.

Learning How to Fly FPV Drones
One might think that mastering line of sight (LOS) flying is necessary before attempting FPV, but this isn’t always the case. LOS and FPV are two distinct flying styles. Nonetheless, being able to control your quad in LOS is valuable, as your FPV system could fail, and having some LOS skills can help you regain control in an emergency. Ultimately, it’s up to you whether to start FPV without any LOS experience.
FPV simulators are incredibly beneficial for beginners, as they help you develop basic skills quickly and reduce the cost of broken parts due to pilot errors or attempting maneuvers beyond your ability. Check out this list of popular FPV simulators: https://oscarliang.com/free-quadcopter-simulator-drone-multirotor-trainer/
Transferring the skills learned in a simulator to real-life FPV drone flying may take some time, but eventually, everything will click, and the sky will become your playground!
For more information on learning FPV flying, have a look at these articles and explore some motivation and advice for mastering FPV:
Avoid Auto-Level Mode
While self-level flight mode (such as Angle Mode and Horizon Mode) are easier and tempting to rely on, if you want to get good with flying FPV drone, it’s crucial to learn Acro Mode (aka manual mode).
This article explains the differences between Acro mode and self-level mode: https://oscarliang.com/rate-acro-horizon-flight-mode-level/
Acro mode may seem challenging initially, but once you master it, you gain complete control over your quad. Betaflight offers an Acro Trainer mode to help you get used to Acro without the risk of flipping or spinning out of control.
Auto-level mode acts like a pair of crutches, helpful for balance but limiting in more dynamic situations. Once you’re comfortable with acro mode, auto-level mode will feel restrictive, and it can foster bad habits that are hard to unlearn.
Flying with Other People
When arriving at an FPV meetup, the first thing you should do is determine which video transmitter channels are in use by other pilots.
DO NOT power on your quad before confirming your video channel, especially when there are other pilots in the air! If they are in the air, wait until they land before you power on.
When two quads share the same VTX channel or have frequencies too close to each other, one can interfere with their video feed. Interference can cause accidents, as the image in the goggles may disappear entirely while flying, leaving the pilot “blind.”
Always warn other pilots before powering on your quad.
Even if you’re not on the same channel, some low-quality VTXs can emit power through the entire spectrum during startup or channel changes, causing brief interference for everyone else.
You can also switch on your video receiver first to scan which channels are in use before turning on your video transmitter.
With proper equipment and frequency management, up to eight pilots can usually fly simultaneously. However, having four pilots is more common for an interference-free race.
Safety Rules for Flying FPV Drones
Safety should always be your top priority.
Keep in mind that FPV drones are extremely fast and powerful, capable of causing serious injuries to people and animals, as well as damaging property. Adhering to safety rules is crucial, as disregarding them not only affects the pilot and potential victims but also the reputation of the hobby itself.
- Check your local rules and regulations regarding FPV, and RC model flying in general.
- Obtain insurance coverage for your drone activities.
- Use a spotter or fly with a buddy.
- Choose your flying location sensibly, avoiding crowded or risky areas.
- Never fly too close to or above people and animals.
- Disconnect the battery immediately after retrieving a crashed quad.
- Do not attempt to catch an FPV drone in mid-air.
- Never use damaged LiPo batteries and dispose of them properly. Here’s a guide on how to dispose LiPo battery: https://oscarliang.com/dispose-lipo-battery-safely/
For more information on FPV safety, refer to this detailed article: http://intofpv.com/t-safety-first-and-foremost
Capturing Beautiful FPV Footage
If you’ve ever watched a breathtaking FPV video on YouTube and wondered how the pilot captured such high-quality footage, you should know that the secret lies in using a separate HD action camera.
Footage recorded in the FPV goggles is typically far from 1080p HD quality, let alone 4K. To capture the stunning visuals you see online, pilots often use a separate HD action camera, like a GoPro or a similar camera, mounted on the drone with a 3D printed TPU mount.
To learn more about HD Action Camera used in FPV drone, check out this article: https://oscarliang.com/action-camera/
How to Tune FPV Drone
Tuning your FPV drone helps optimize its performance and stability.
It’s recommended to use “Blackbox” to tune your drone. Blackbox is a powerful tool that records flight data during your drone’s flight, providing valuable insights for tuning. By analyzing the data, you can fine-tune your drone’s PID settings and filters to achieve better performance. For a comprehensive guide on tuning using Blackbox, check out this tutorial: https://oscarliang.com/pid-filter-tuning-blackbox/
If Blackbox seems too complicated, you can still manually tune your drone without Blackbox. Although you may not achieve the same level of performance optimization as with Blackbox, you can still improve your drone’s performance from the default settings. To manually tune your drone, follow these steps: https://oscarliang.com/fpv-drone-tuning/
Remember that tuning is a personalized process, and what works for one pilot may not work for another. It takes time, patience, and practice to find the ideal settings for your FPV drone.
Conclusion
Throughout this comprehensive FPV drone tutorial, we’ve covered essential topics such as understanding drone components, choosing the right gear, building or buying your first FPV drone, and tips for flying safely and effectively. We’ve also delved into the different FPV systems, and the importance of proper tuning and software setup.
As you embark on your FPV journey, remember that practice, patience, and a commitment to safety are crucial. Consider starting with simulators and building your skills gradually, and never hesitate to ask for help from the FPV community. Stay up to date with the latest advancements in FPV technology, and most importantly, enjoy the incredible experience that FPV flying has to offer. Happy flying!
FAQ
How High Can Drones Fly?
Technically, a drone can fly as high as its battery allows. For a typical 5″ FPV drone, this could be a few kilometers. However, most countries impose a height limit for recreational RC models, such as 400ft in the US or 120m in most Europe. Therefore, I do not recommend exceeding the legal limits where you are flying and breaking the law.
What is the Maximum Speed of an FPV Drone?
The maximum speed varies based on the hardware used. Typically, a hobby-level 5-inch FPV drone can reach speeds up to 180 km/h or higher. The world record for the fastest FPV drone, as of January 3rd, 2023, is 360 km/h.
Edit History
- Sept 2015 – Article Created
- Dec 2016 – Article revised, added “The Origin of Drone Racing and the Types of Drones”
- May 2017 – Added “Buy a Radio First and Learn How To Fly”
- Aug 2017 – Updated
- Apr 2019 – Updated
- Aug 2020 – Rewritten
- Apr 2021 – Merged with FPV system guide
- Feb 2023 – Updated guide
- Apr 2025 – Updated guide
