

One of the most important settings in FPV drone tuning is rates—they determine how your drone responds to stick inputs. If your rates are too high, your quad will feel twitchy and hard to control. If they’re too low, it may feel sluggish and unresponsive. In this tutorial, I’ll break down what Betaflight rates are, how they work, why Actual Rates are the best option, and how to pick the perfect rates for your flying style.

Rates Need Tuning
Just like PID and filters, rates need to be fine tuned to optimize your drone’s performance. You’ll be amazed by the significant improvements you can achieve in your flying experience by tuning rates to match your unique flying style and requirements.
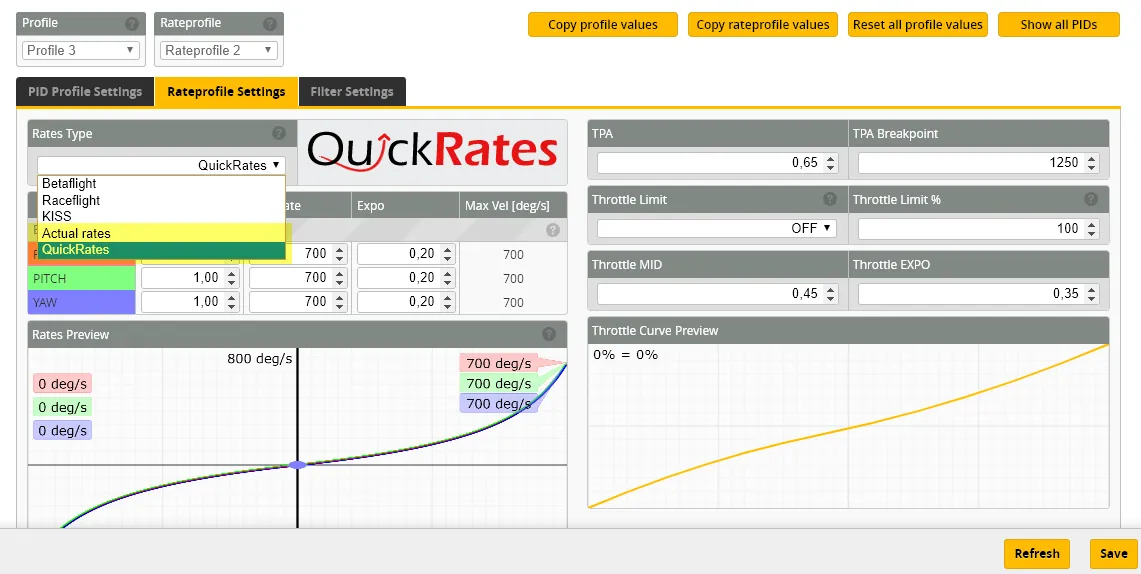
Betaflight offers a total of five rate systems:
- Actual Rates
- Betaflight Rates
- Raceflight Rates
- KISS Rates
- Quick Rates
However, the most widely used are Actual and Betaflight Rates.
In this tutorial, we will delve into the key features of Actual Rates and Betaflight Rates, how they work, and how I find my preferred rates. If you are not sure which rate system to use, my recommendation for both beginners and experienced pilots would be to start with the default – Actual Rates. It’s effective and intuitive to use.
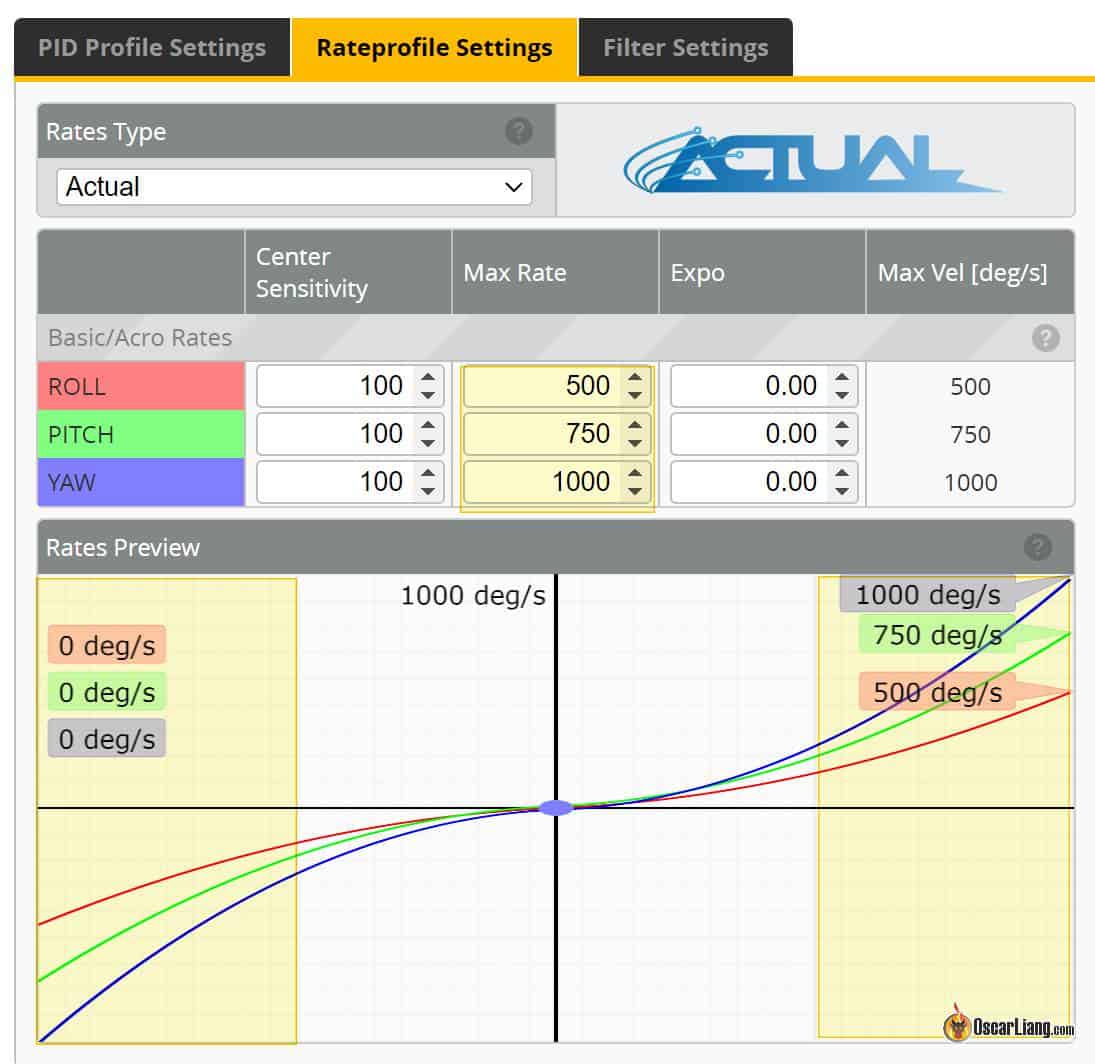
Understanding Actual Rates
“Actual Rates” are the default rates in Betaflight, providing a straightforward approach to setting maximum rotational velocity (e.g., entering 1000 corresponds to 1000deg/sec) and center sensitivity values. No more guessing, as this system is far more intuitive and less confusing for pilots compared to the older Betaflight rates.
If you are new to the hobby, I’d recommend using Actual rates. If you come from another type of rates, there are many online tool that help you convert rate values between these different systems.
There are 3 values in Actual Rates: Center Sensitivity, Max Rate, Expo.
Center Sensitivity

Center Sensitivity relates to the responsiveness around the center stick position. A lower value offers finer, smoother control, while a higher value results in a more reactive drone to stick movement.
Max Rate
Max Rate defines the drone’s spin speed at full stick deflection. The value entered represents the exact maximum rotational velocity. For example, entering 700 means your drone will attempt to rotate at 700 degrees/sec at full stick.
However, keep in mind that the maximum angular velocity can be limited by your motors. When motors reach their physical limitations and cannot spin any faster, the maximum angular velocity is capped, regardless of the higher value set in Betaflight.
Expo

Expo flattens the curve between center stick and full stick. To achieve a more linear rate, keep Expo low. For a broader center stick region with finer control, increase Expo. Keep in mind that increasing Expo also reduces center sensitivity. While Expo can be as high as 1.0, excessive Expo might cause decreased center stick sensitivity and make the drone’s response more unpredictable towards full stick (more jumpy).
Tuning Actual Rates
Start by setting the Center Sensitivity. Cruise around and navigate through gaps to test the desired control precision around the center stick. For small adjustments and precise aiming through gates and gaps, the drone must be precisely controlled. If the Center Sensitivity is too high, the drone will overreact and become jittery. Review your flight footage will help you judge more objectively.
Next, establish your Max Rate by performing flips and rolls – make sure you are happy with how snappy your drone is. This step should be relatively straightforward.
Lastly, practice freestyle moves involving various stick positions between center and full stick. To flatten the rate curve, add some Expo, but be aware that this can reduce predictability towards full stick. If you increase Expo too much, you may need to raise Center Sensitivity slightly to compensate. Expo is primarily a matter of personal preference.
Repeat this process for roll, pitch and yaw, or you may copy the same values for all 3 axes.
My Rates
Here’s a general guideline for different flying styles and applications based on my personal experience:
- Cinematic / Racing: 500-800 Max Rate
- Freestyle: 600-1000 Max Rate
- Line of Sight: 1000+ Max Rate
Then set center sensitivity according to your flying style. Lowering center sensitivity lets you make tiny corrections without jerky movement—this is especially useful for cinematic flying and smooth freestyle lines.
- Cinematic: 50-150 Center Sensitivity
- Freestyle: 100-200 Center Sensitivity
- Racing / Line of Sight: 150-300 Center Sensitivity
Expo controls how smooth or aggressive your stick response is in the middle of stick travel. If your quad feels too linear and robotic, adding a bit of expo can make movements feel more natural. If you fly freestyle, a small expo curve makes tricks like juicy flicks and snap rolls feel smoother. But too much expo can make movements far less predictable.
- Cinematic: High expo (0.4 – 0.7) for ultra-smooth shots.
- Freestyle: Medium expo (0.3 – 0.6) for balance between smoothness and snap.
- Racing: Low expo (0 – 0.3) for quick, linear and predictable response.
My Freestyle Rates
Pitch/Roll
- Center Sensitivity: 190
- Max Rate: 1000
- Expo: 0.70
Yaw
- Center Sensitivity: 200
- Max Rate: 650
- Expo: 0.55
Note that my rates differ depending on how I hold the sticks. When “pinching”, my max rates are similar, but center sensitivity tends to be higher because I can move the sticks more accurately when I am pinching compared to thumbing. Here are my thumbing rates for comparison:
Pitch/Roll (Thumbing)
- Center Sensitivity: 140
- Max Rate: 1000
- Expo: 0.50
Yaw (Thumbing)
- Center Sensitivity: 180
- Max Rate: 650
- Expo: 0.40
My Tiny Whoop Rates
Pitch/Roll
- Center Sensitivity: 230
- Max Rate: 1000
- Expo: 0.62
Yaw
- Center Sensitivity: 250
- Max Rate: 1300
- Expo: 0.68
Notice my yaw rate is a little higher because I use a lot of yaw when flying tiny whoops indoor due to the amount of rapid sharp turns.
Delving into Betaflight Rates
Betaflight Rates is a legacy system, and while I don’t recommend it I thought it would be nice to have a little introduction for newcomers. Why I don’t recommend it? Well, it’s harder to use than Actual Rates because the three terms are interdependent, making it less intuitive to use.
RC Rate
RC Rate affects the rate curve’s slope linearly throughout the entire stick range and determines how quickly the quadcopter rotates at full deflection. If you’re familiar with computers, you can think of it as mouse sensitivity.
A higher rate results in a more responsive but twitchier quad. Small stick movements will produce significant quad movements. Increasing the RC Rate also boosts the quad’s spin speed, enabling faster flips and rolls.

However, keep in mind that the maximum angular velocity can be limited by your motors. When motors reach their physical limitations and cannot spin any faster, the maximum angular velocity is capped, regardless of the higher value set in Betaflight.
RC Expo
RC Expo, also known as Exponential or simply Expo, reduces sensitivity near the stick’s center where fine controls are needed (for Roll, Pitch, and Yaw) but does not change the maximum angular velocity at full stick.
Expo is a percentage value, ranging from 0% (0) to 100% (1). At 0%, the increase in rotational speed between minimum and maximum stick input is linear, forming a “V” shape with no stick input in the center. At 50% stick input, your quad will rotate around the given axis at exactly half the maximum rotational velocity.

Increasing Expo reduces sensitivity around mid-stick, requiring further stick movement to achieve the same rotational velocity. Visualize Expo as transforming the “V” shape into a “U”, with a higher expo percentage flattening the “U” around the middle.
Super Rate
Super Rate (or simply Rate) increases both max angular velocity and sensitivity around the center stick.

By raising the Super Rate, you can maintain moderate stick sensitivity around mid-stick for standard flying maneuvers while still achieving snappy rolls and flips at the stick endpoints.
Super Rate essentially combines the effects of RC Rate and Expo, allowing for more flexibility in achieving the desired stick feel.

So why use Super Rate? We can just use RC Rate and Expo right? Yes, sort of, but having Super Rate gives us more flexibility in achieving the stick feel we want.
Tuning Betaflight Rates
Tuning rates ultimately depends on personal preference and “feel.”
Begin with the default Betaflight values: RC Rate 1.0, Super Rate 0.7, Expo 0 for all three axes.
When tuning my rates, I always adjust RC Rate first. Perform flips and rolls, and if the quadcopter spins too slowly, increase RC Rate until satisfied. Note down the max angular velocity (deg/sec) in the Betaflight Configurator. For my freestyle rig, I usually aim for around 700-800 degrees per second.
Next, simply cruise around (without flips or rolls) and ensure the quadcopter responds swiftly and predictably to your stick inputs during turns. If it’s too sensitive for precise movement, increase Expo. If it’s too slow to react (not sensitive enough), decrease Super Rate while increasing RC Rate to compensate and raise the max angular speed.
Expo isn’t always necessary since Super Rate can provide the same effect. However, if you still find small movements around mid-stick too sensitive, increase Expo until you strike the right balance between precision and responsiveness.
Pro Tip: Applying Expo on the radio (TX) reduces your stick resolution, so always set Expo in the flight controller software whenever possible!
You may need to iterate through the process several times until the rates feel perfect. Remember that pitch, roll, and yaw rates don’t need to be identical—freestyle pilots often prefer higher roll and yaw rates but lower pitch rate, it’s all personal preference.
Different flight controller software has different ranges and scaling in PID, rates and expo, so the same numbers don’t necessarily give the same results in a different firmware. You should be able to find online converters if you want to migrate to a different FC firmware.
To give you some examples, here are the Rates and Expos I used in the past:
Freestyle
- RC Rate – 1.2
- Super Rate – 0.77
- RC Expo – 0.20
Smooth Cruiser:
- RC Rate = 0.80
- RC Expo = 0.00
- Super Rate = 0.65
Expo is set to zero here on purpose, this is to avoid overreacting in close situations and actually gives you overall smoother result.
Aggressive Acro Quad:
- RC Rate, Pitch/Roll = 1.80, Yaw = 2.00
- Super Rate, All = 0.64
- RC Expo, Pitch/Roll = 0.20, Yaw = 0.15
Tiny Whoop Rates
- Roll+Pitch: RC Rate 1.2, Super Rate 0.75, Expo 0
- YAW: RC Rate 1.3, Super Rate 0.80 Expo 0
- If using acro mode, enable crash_recovery, there are some settings (get crash_ in CLI) you might want to tune first to avoid false self-centering.
As your flying skill improves, and you become more comfortable performing aggressive manoeuvres, you could try to crank up your rates. And you will also probably want to use a bit more expo to maintain accurate fine control.
There is no right or wrong Expo and Rate values, as long as it suits you. For example, I have shaky fingers, so my expo might be a bit higher than others. :p
Don’t Change Your Rates!
Some pilots adjust their rates for different drones, but this can be counterproductive.
Maintaining consistent rates across all your quads is crucial for developing muscle memory. Having consistent rates allows you to instinctively control the drone’s movements. If you’re constantly tweaking your rates, your instincts will never fully develop. Instead, pick one set of rates and stick with them—this will help you build consistent, instinctive stick control, no matter what you’re flying.
That said, this rule primarily applies to quads of similar size and power. If you’re flying drastically different aircraft—such as a 5″ freestyle quad and a tiny whoop—it makes sense to adjust rates accordingly. These drones have very different flight characteristics and are flown in entirely different environments, so using different rates for each is both practical and necessary.
Throttle Mid and Throttle Expo
Throttle Expo modifies the shape of the throttle curve, flattening it around the “Throttle Mid” point. This allows for a gentler throttle response and maximum stick resolution around this throttle level.
Throttle Mid adjusts the position in the throttle curve where Throttle Expo is applied. By default, it is set to 50% throttle (0.50), but if you plan to use Throttle Expo, Throttle Mid should be set to the throttle of cruising speed. This is where you will need the most throttle resolution, and Throttle Expo might make altitude control easier for you.
Throttle Mid will not have any effect if you set Throttle Expo to 0, as your throttle curve will remain a straight line regardless of the Throttle Mid setting.
Alternatively, you can set up a throttle curve in your transmitter for even more precise throttle control.
Final Thoughts: The Magic of Actual Rates
Switching to Actual Rates in Betaflight was a game-changer for me. It gave me full control over how my quad responds without annoying side effects from outdated rate systems. If you’re still on old Betaflight rates, do yourself a favor—switch to Actual Rates and never look back. You’ll get smoother, more predictable, and easier-to-tune control.
Edit History
- 2015 – Article created
- 2018 – Article updated
- 2021 – Added info about new feature in Betaflight: Actual Rate
- 2022 – Using Actual Rate as the standard, updated screenshots, updated Rate Tuning instructions,
- 2023 – Simplified URL, optimized title
- Feb 2025 – Updated tutorial
